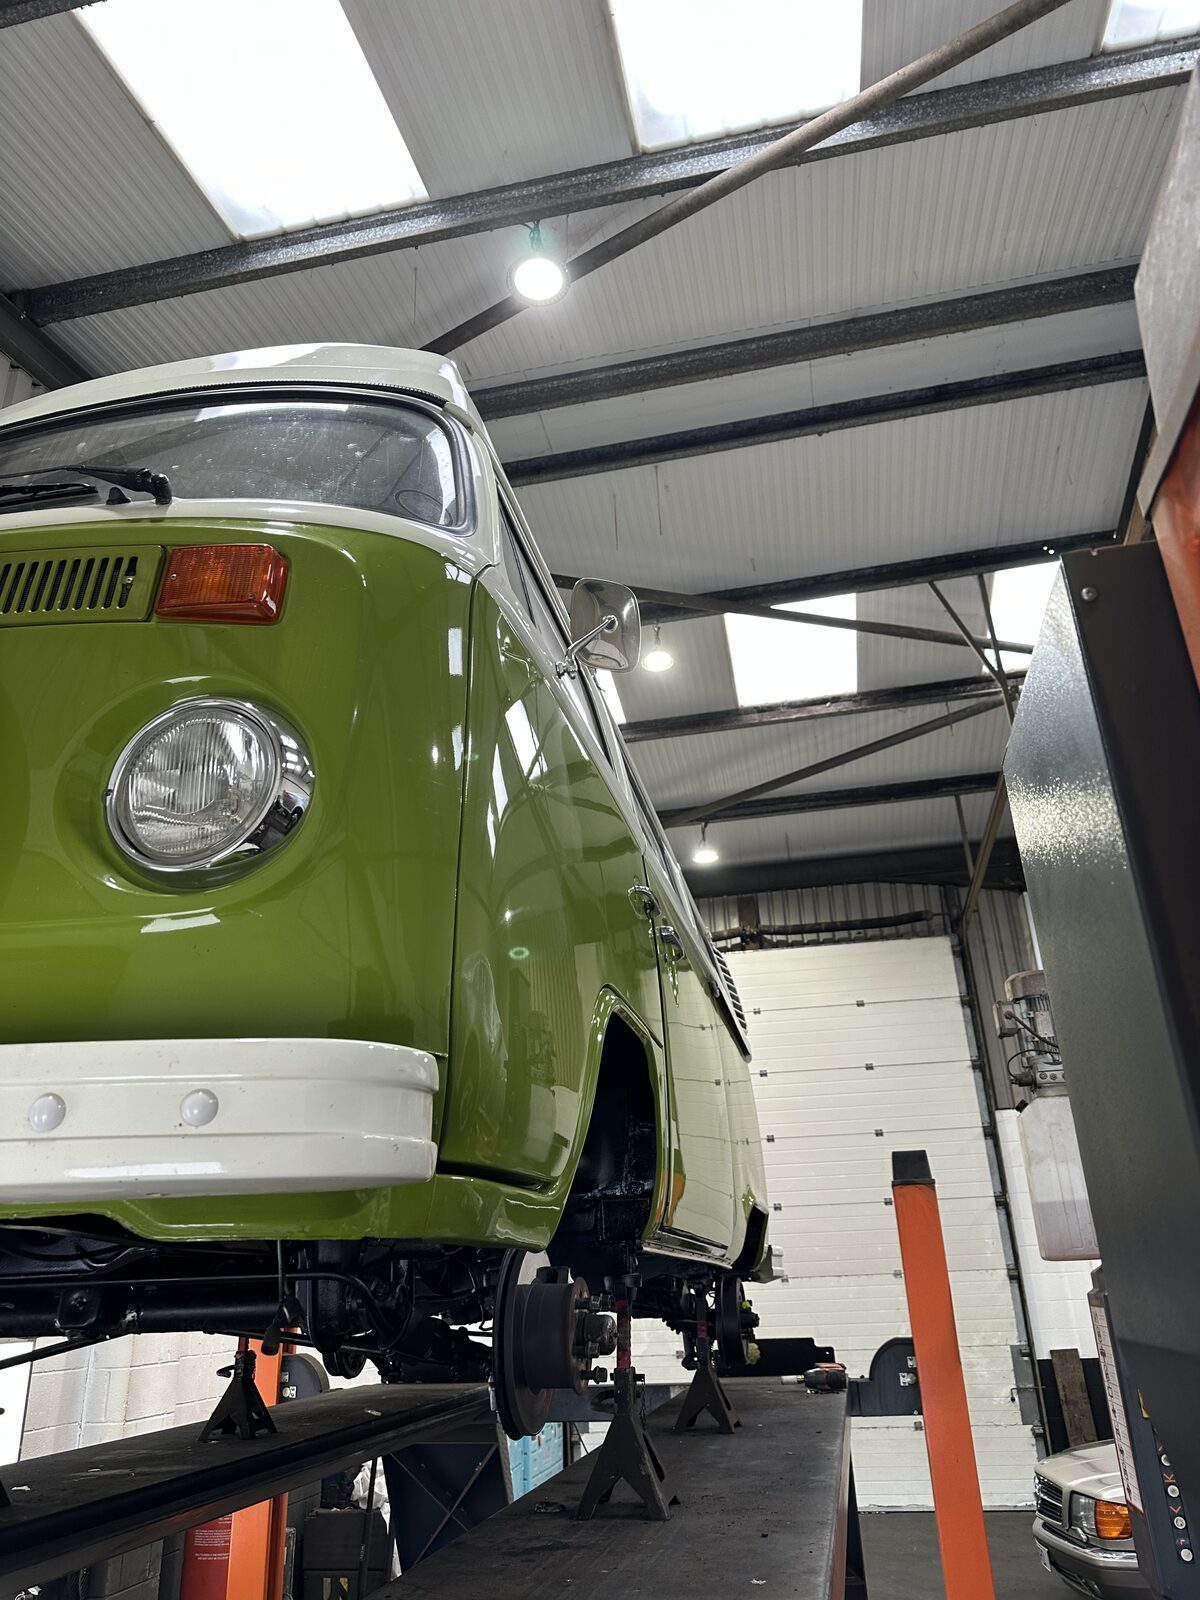
Volkswagen T2 Camper
A much-loved classic camper given a full underbody preservation programme: the underside dry ice cleaned back to original paint, hidden corrosion cut out and welded, active rust neutralised, then sealed with durable black protection, clear protection on selected components and cavity wax inside the chassis – documented at every step.
Published
In short: what was done to this VW T2 camper
A Volkswagen T2 camper came in for a full underbody preservation programme covering the underbody, floor pans, wheel arches and chassis cavities. The underside was dry ice blasted (no water, no abrasive media, no residue), which lifted decades of grime and old underseal to reveal the camper's original paint – and exposed hidden corrosion and an old fibreglass repair. Perforated metal was cut out and new sections welded in, including new jacking points, active corrosion was neutralised with multi-stage rust treatment, then the underside was sealed with a durable black protection, clear protection on selected components and cavity wax inside the chassis. Every stage was documented for the camper's history file.
What was booked in
The T2 arrived for our full Underbody Preservation programme – covering the underbody, floor pans, wheel arches and chassis cavities. As a classic camper of this age, its underside carried decades of road grime, old underseal and the surface corrosion that comes with a life on UK roads.
The exact condition under the old coating was unknown, so our consultative, in-depth inspection and treatment programme would let the underside be cleaned back, assessed, repaired where needed, treated and protected – then documented to a standard that matches a camper worth keeping for the long term.
- Vehicle
- Volkswagen T2 Camper
- Service
- Full underbody preservation programme
- Protection
- Durable black protection, clear protection & cavity wax
- Areas
- Underbody · Floor pans · Wheel arches · Chassis cavities
The preservation programme standard
Every vehicle follows the same programme, with the work paused for your decision whenever the condition changes the scope – which, on this camper, it did.
Plan & Pre-Inspection
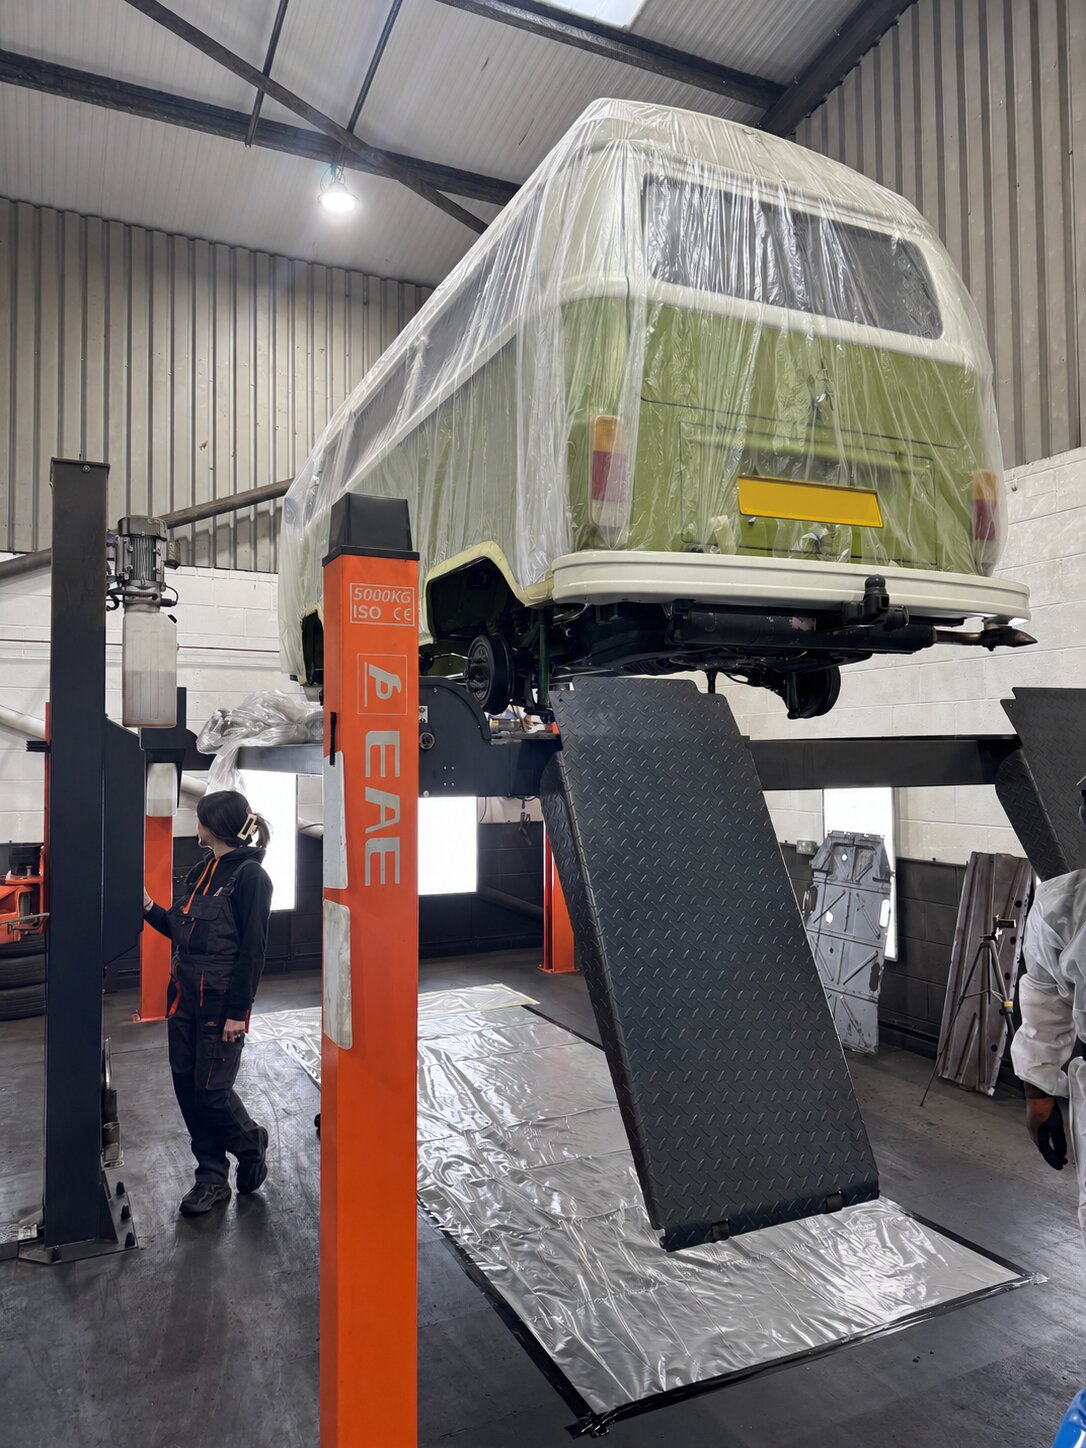
- Camper received and stored inside with 24hr security
- Body masked and protected before any work began
- Full underbody inspection photos delivered
Dry Ice Blast
- Underbody, floor pans, arches, suspension and undertrays
- No water, no abrasive media, no residue
- Pressure adjusted by area – gentle enough to keep original paint intact
Inspect & Check-In
- Underside reviewed area by area once cleaned back
- Findings shared with you – photos, video or call
- Hidden corrosion and old repairs flagged before work continues
Repair & Fabrication
- Perforated metal cut back to sound steel
- New sections and jacking points fabricated and welded in
- Structure made sound before any protection is applied
Multi-Stage Rust Treatment
- Loose corrosion lifted by the ice during blasting
- Active rust chemically neutralised and stabilised
- Sound foundation laid for proper adhesion of protection
Protection & Documentation
- Durable black protection on the underside, clear protection on selected components, cavity wax inside the chassis
- Reassembled and the exterior returned to delivery standard
- Full photographic record retained for the camper's history file
Pre-inspection: where it started
With the body masked and protected, the underside was fully inspected and documented. Years of grime, old underseal and welded-on trays hid the true condition of the metal – so the first job was to see exactly what we were working with before agreeing a plan.
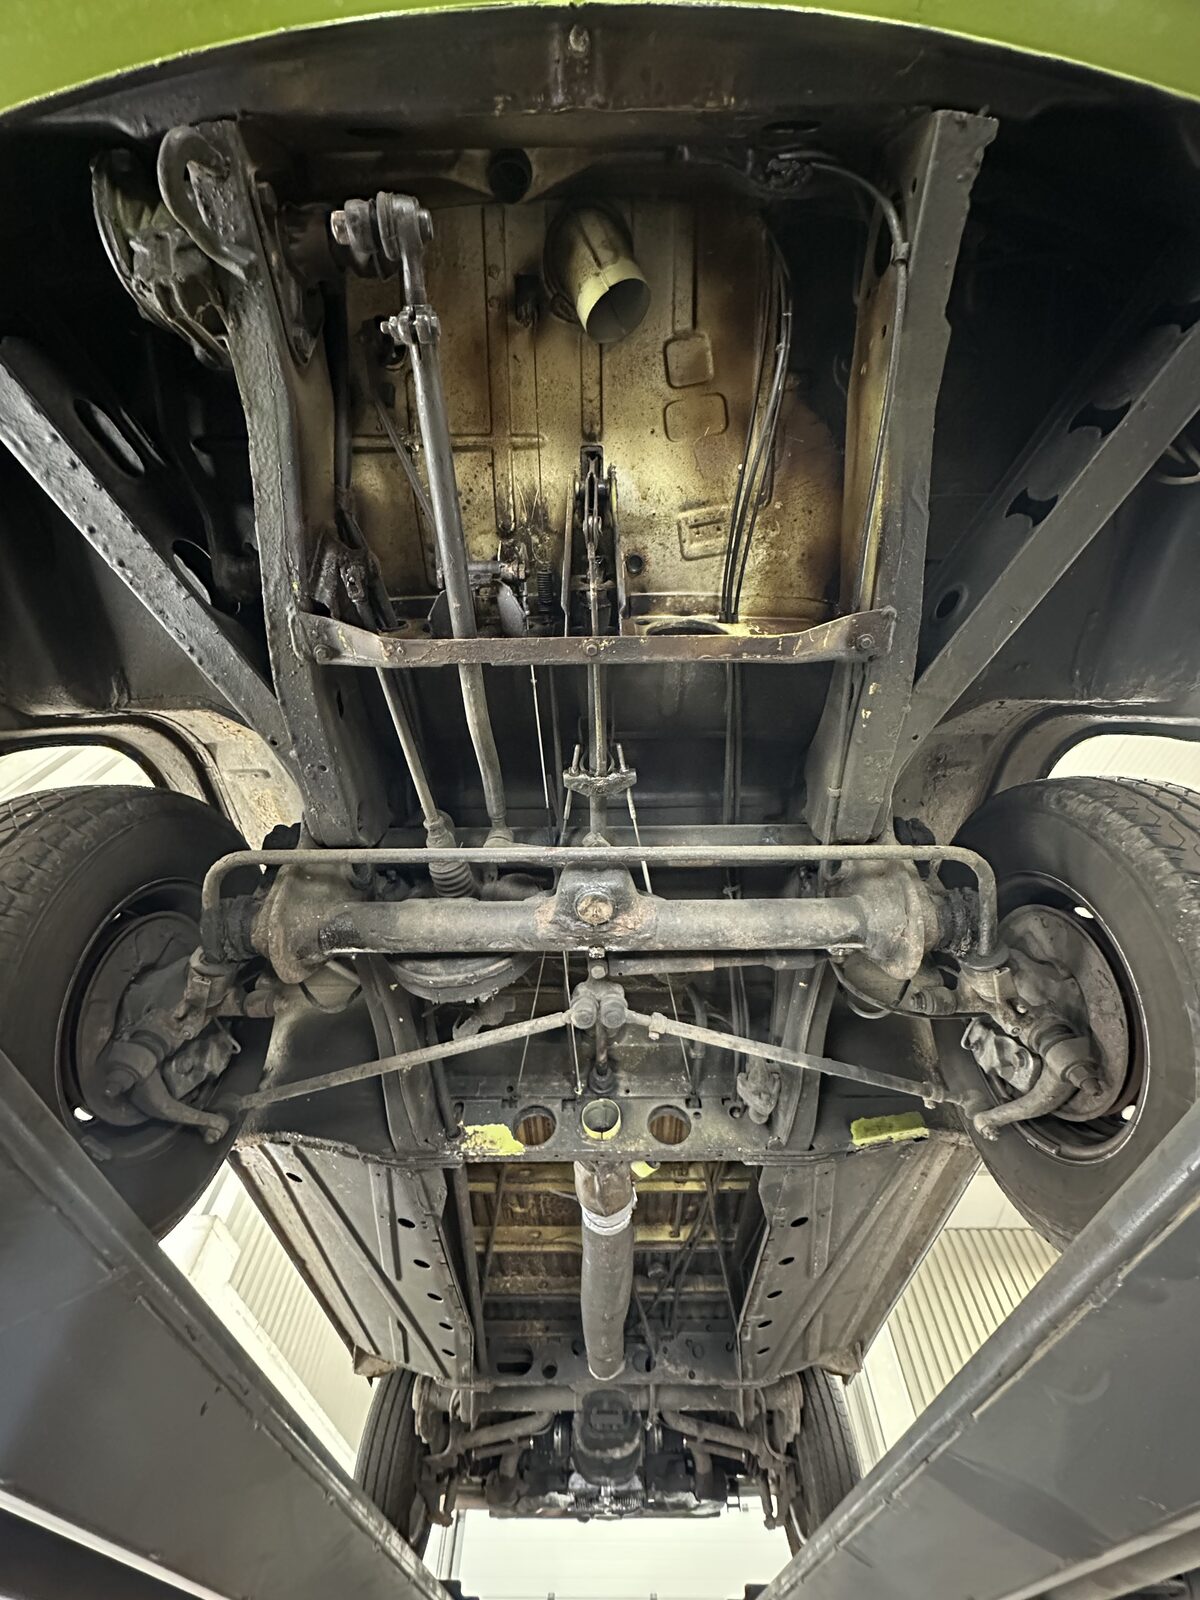
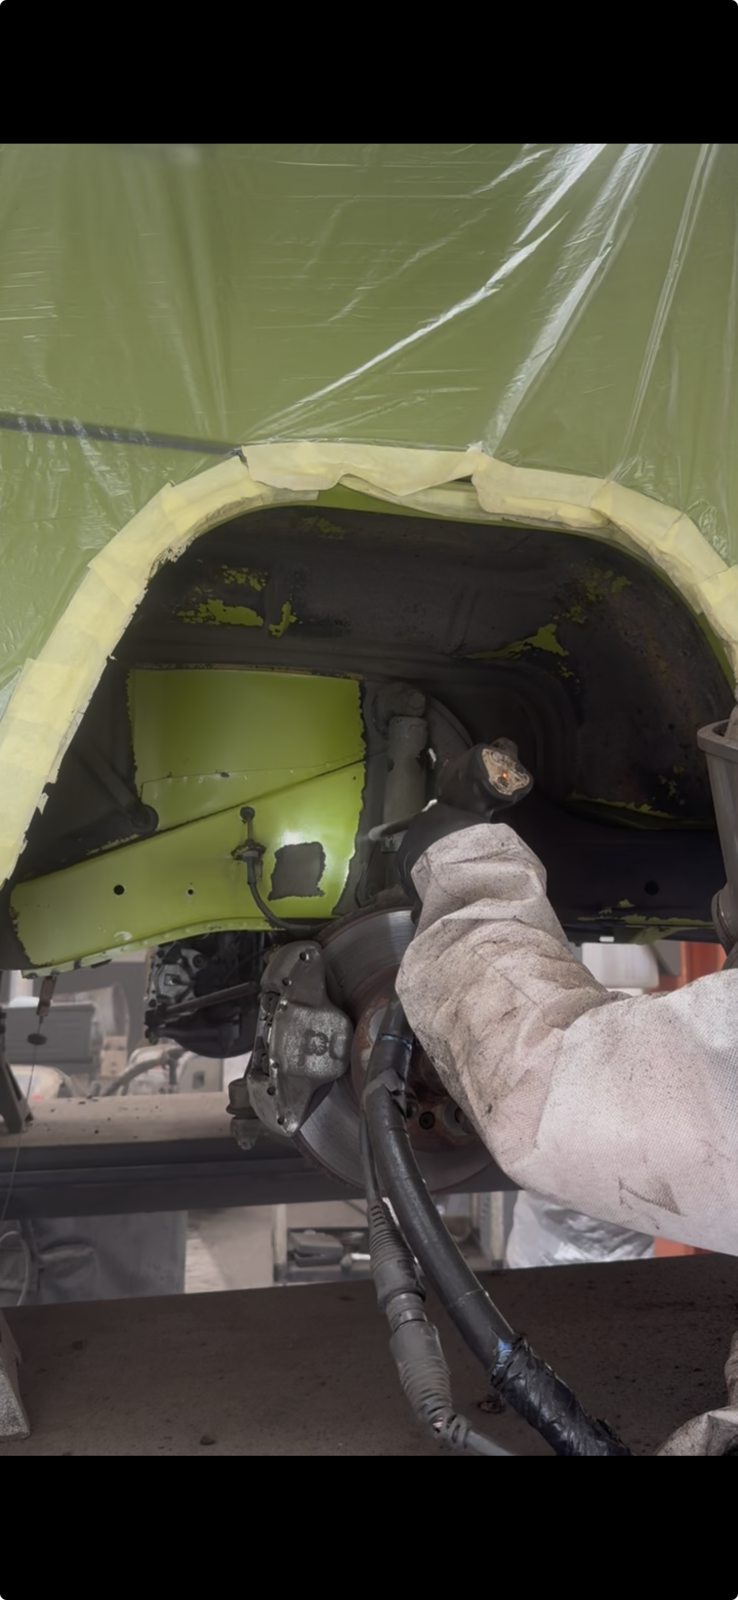
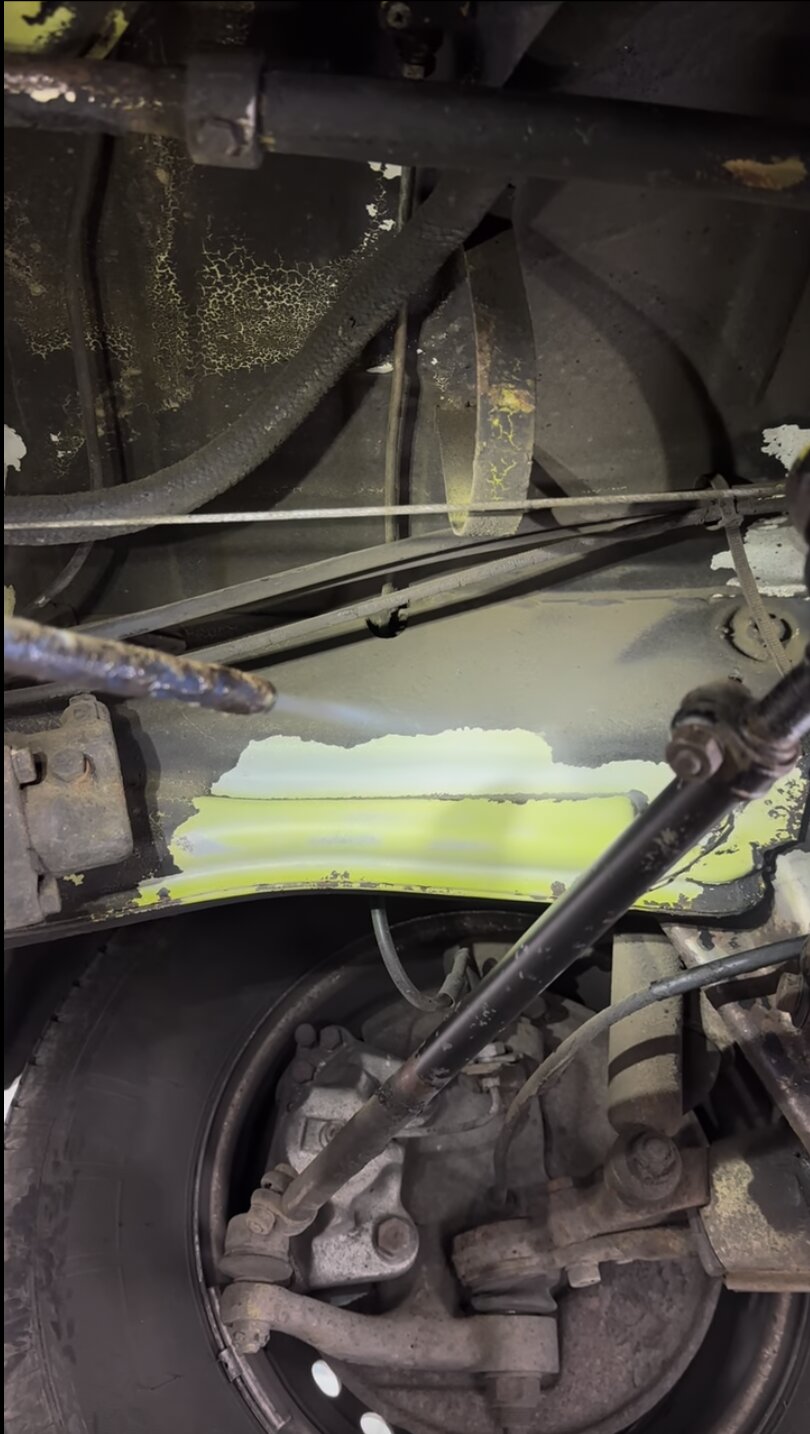
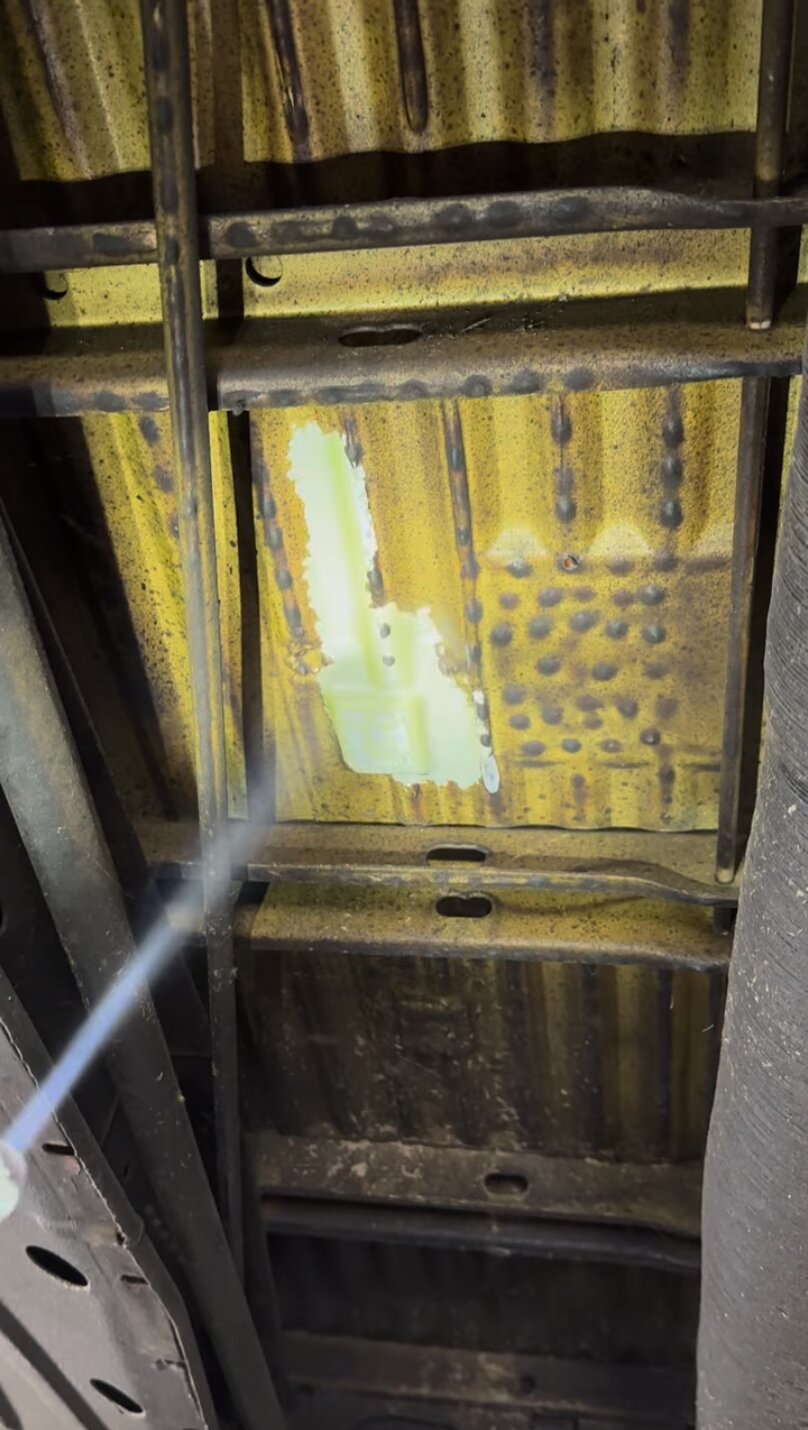
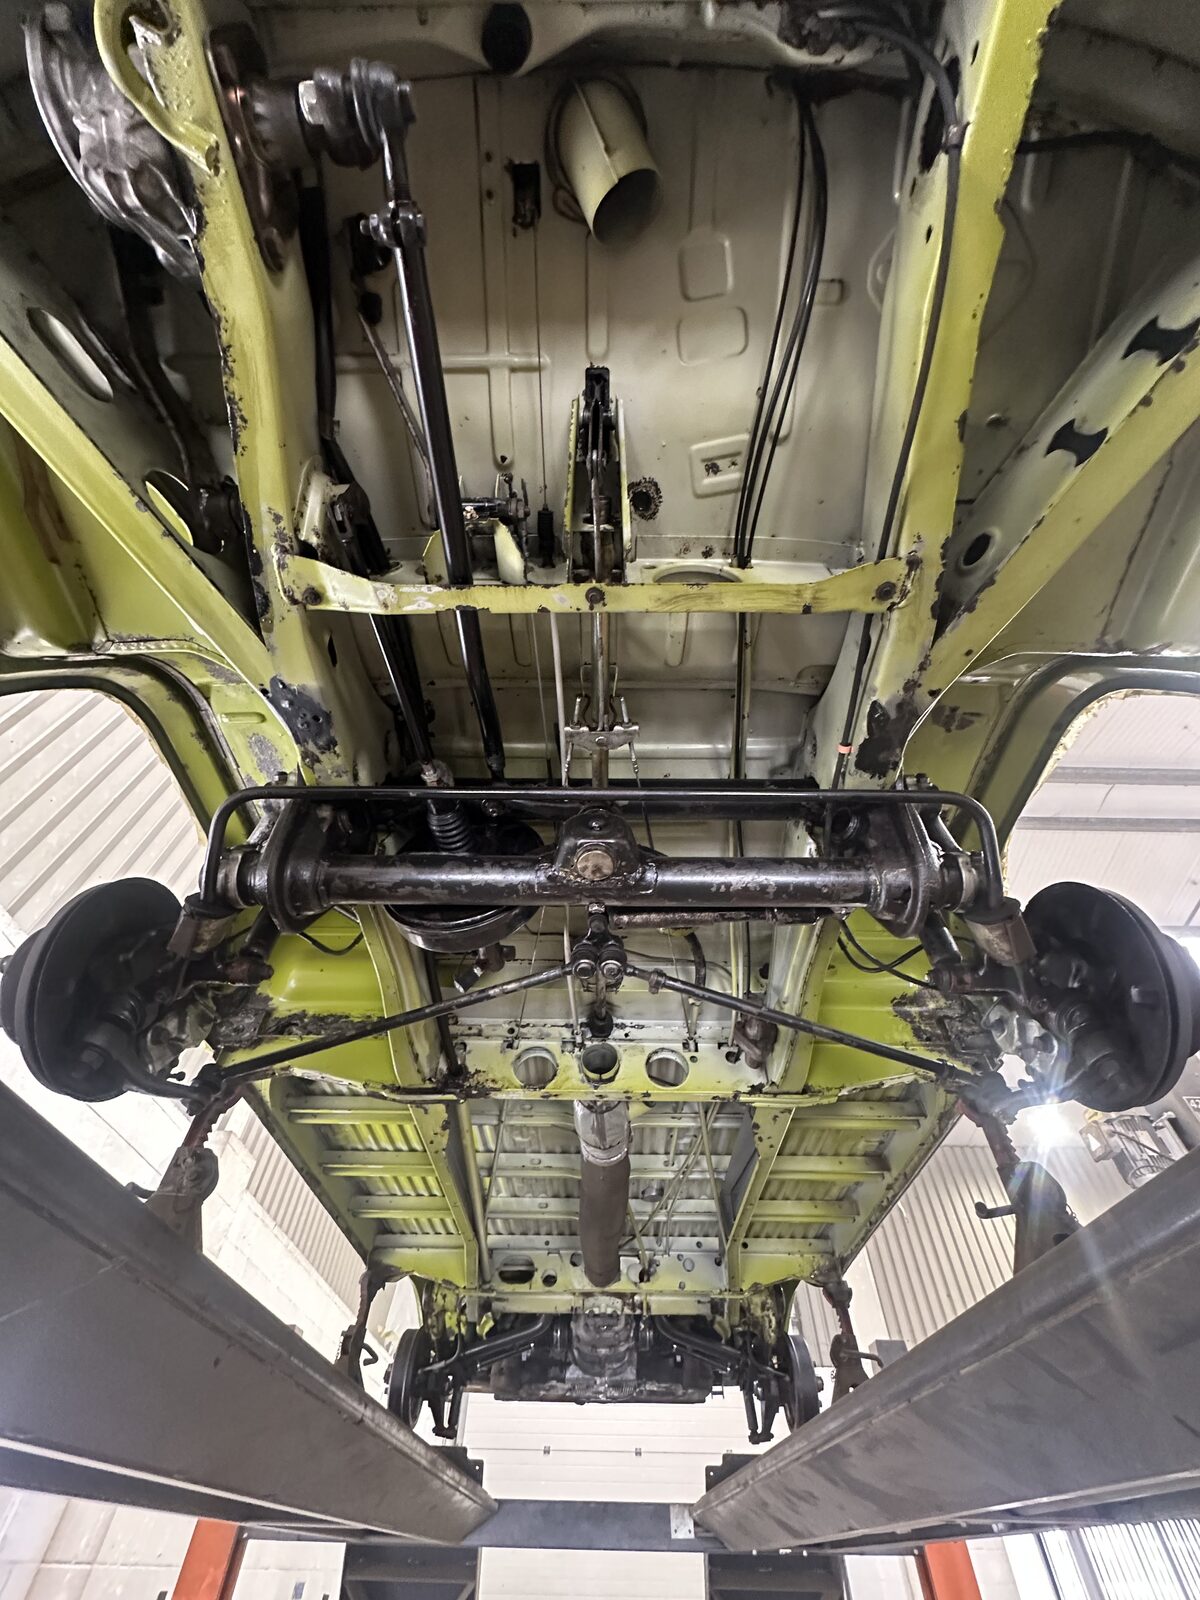
Cleaning back to original paint
Dry ice blasting lifted decades of grime and old underseal cleanly away – no water, no abrasive media and no residue. As the coating came off, the camper's original factory paint appeared underneath, bright and intact in places it had been buried for years. Cleaning back this far is also what made a proper inspection possible.
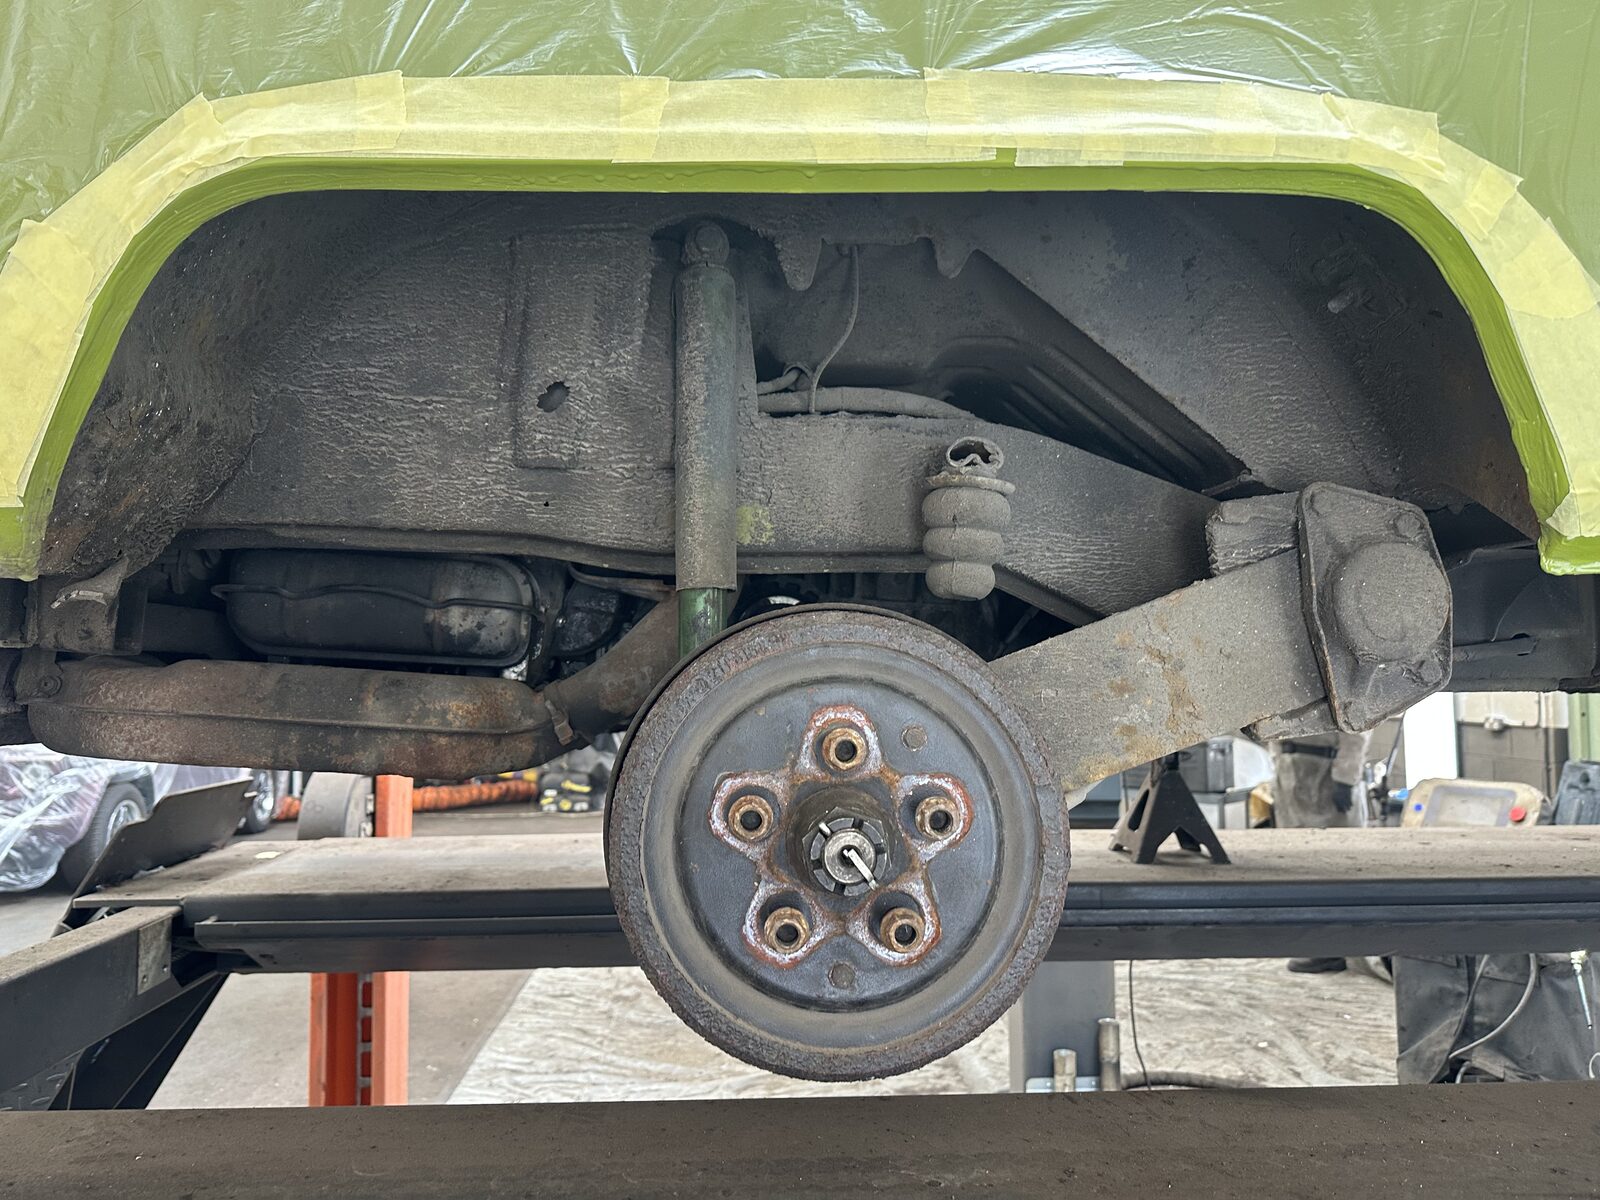
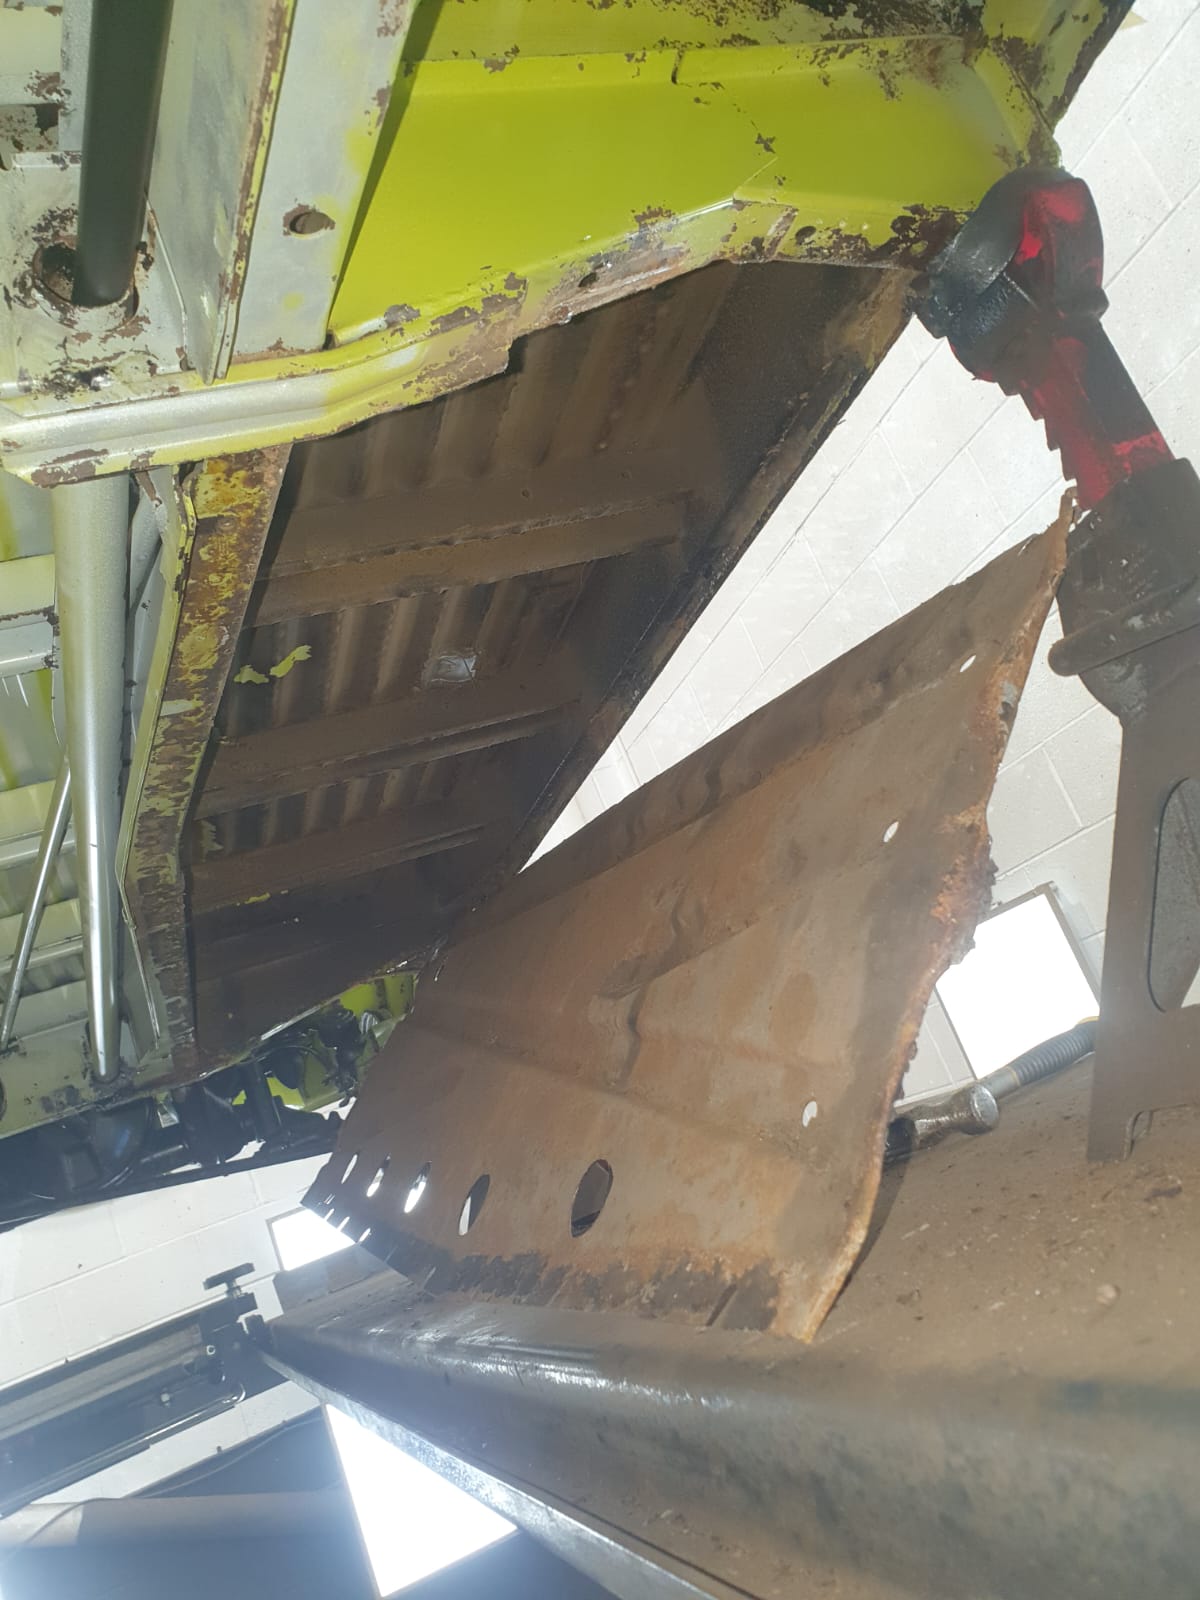
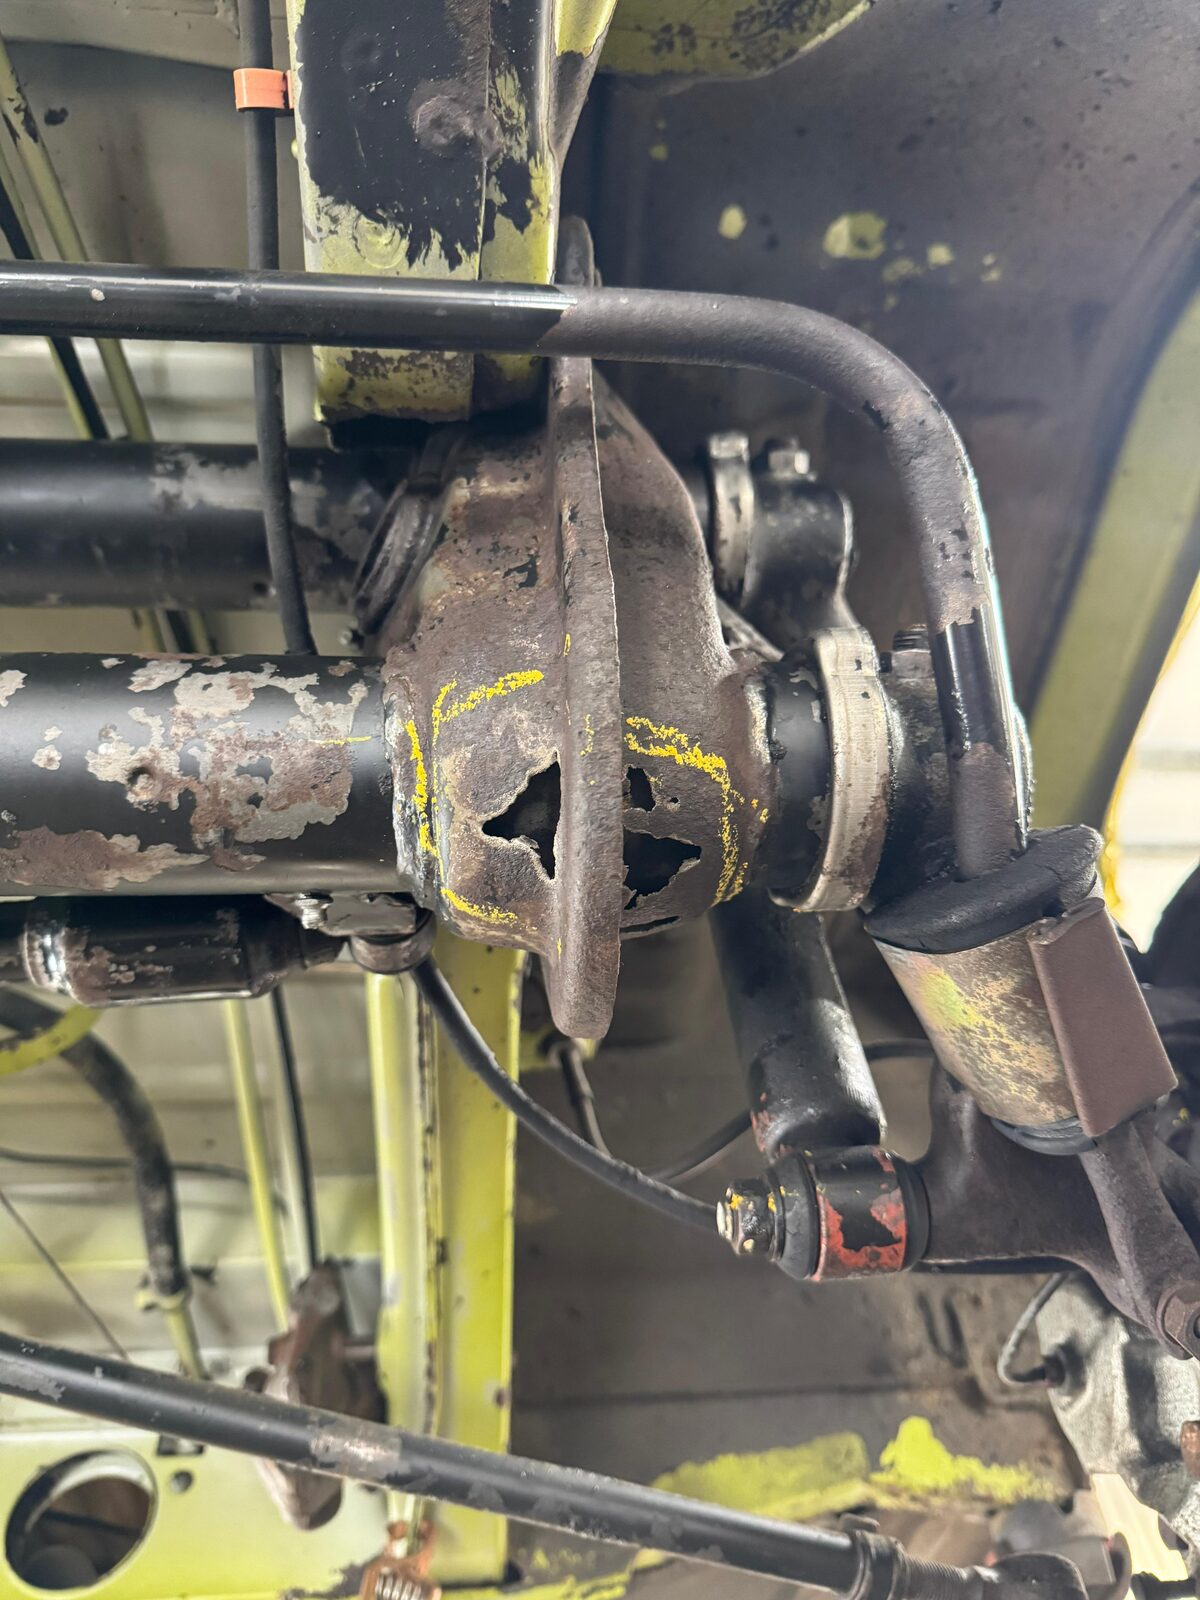
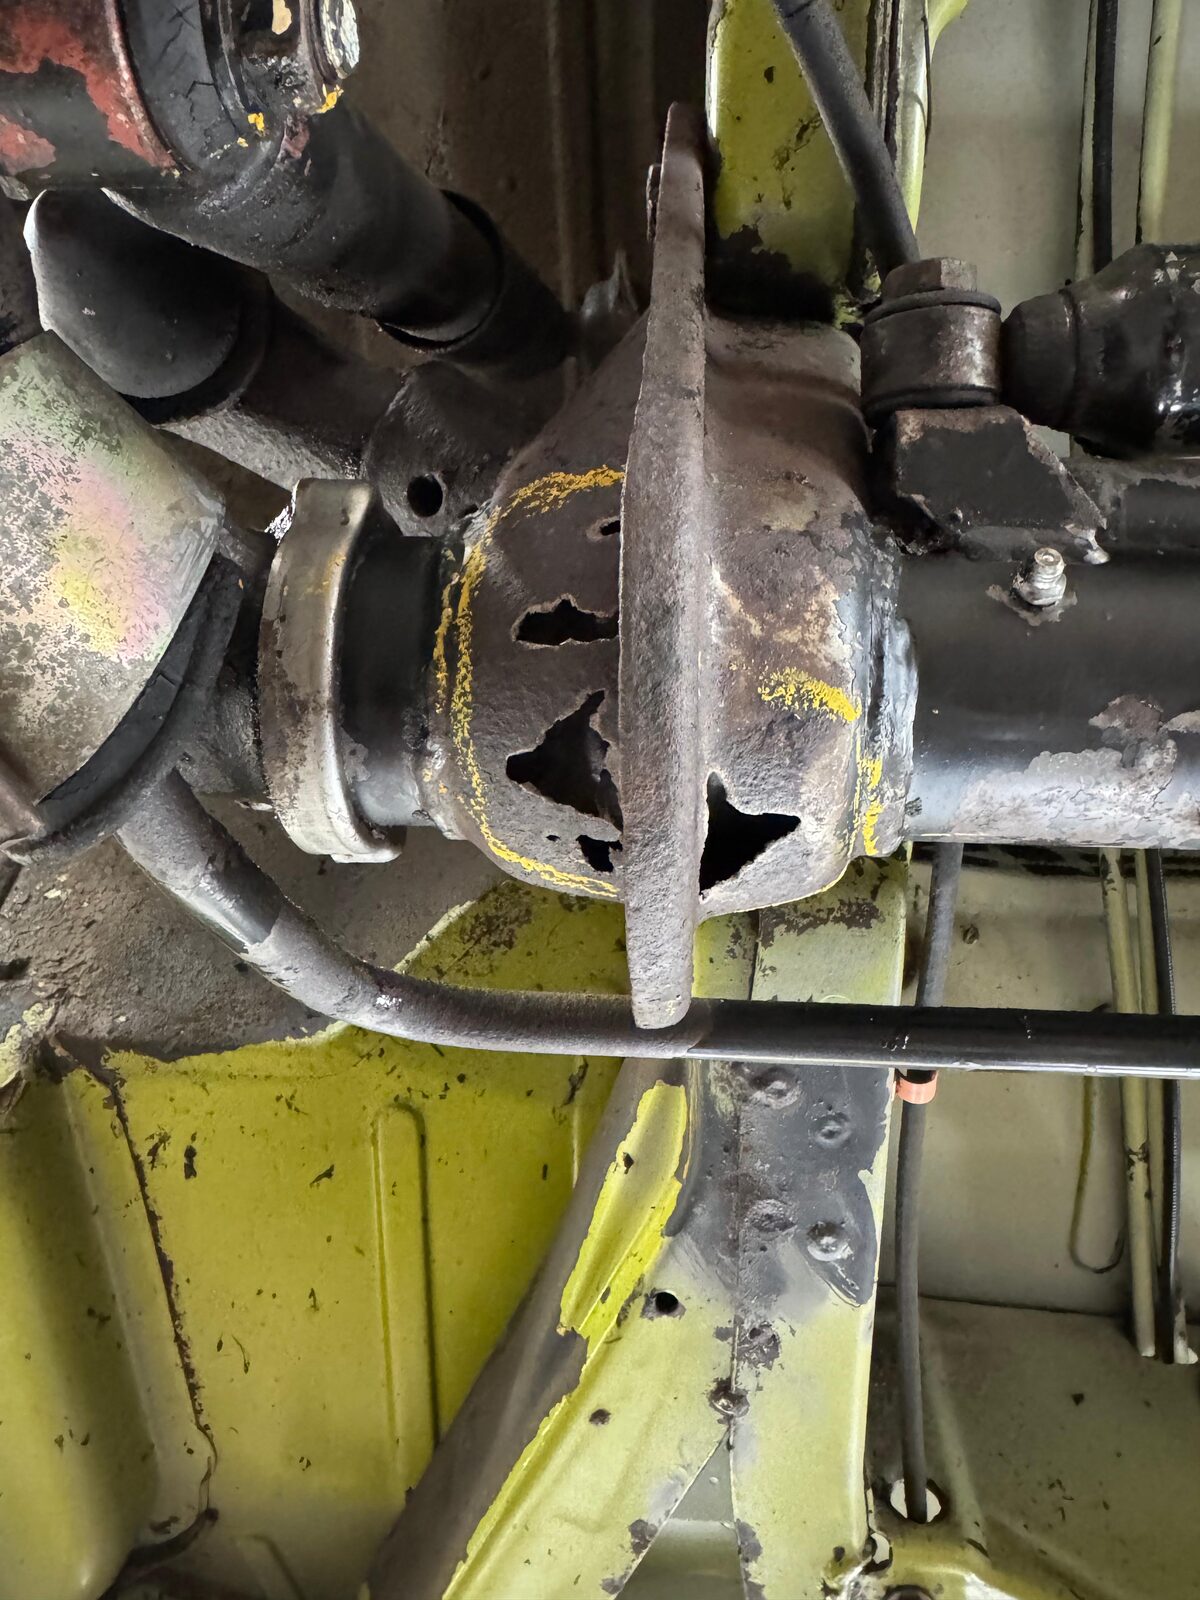
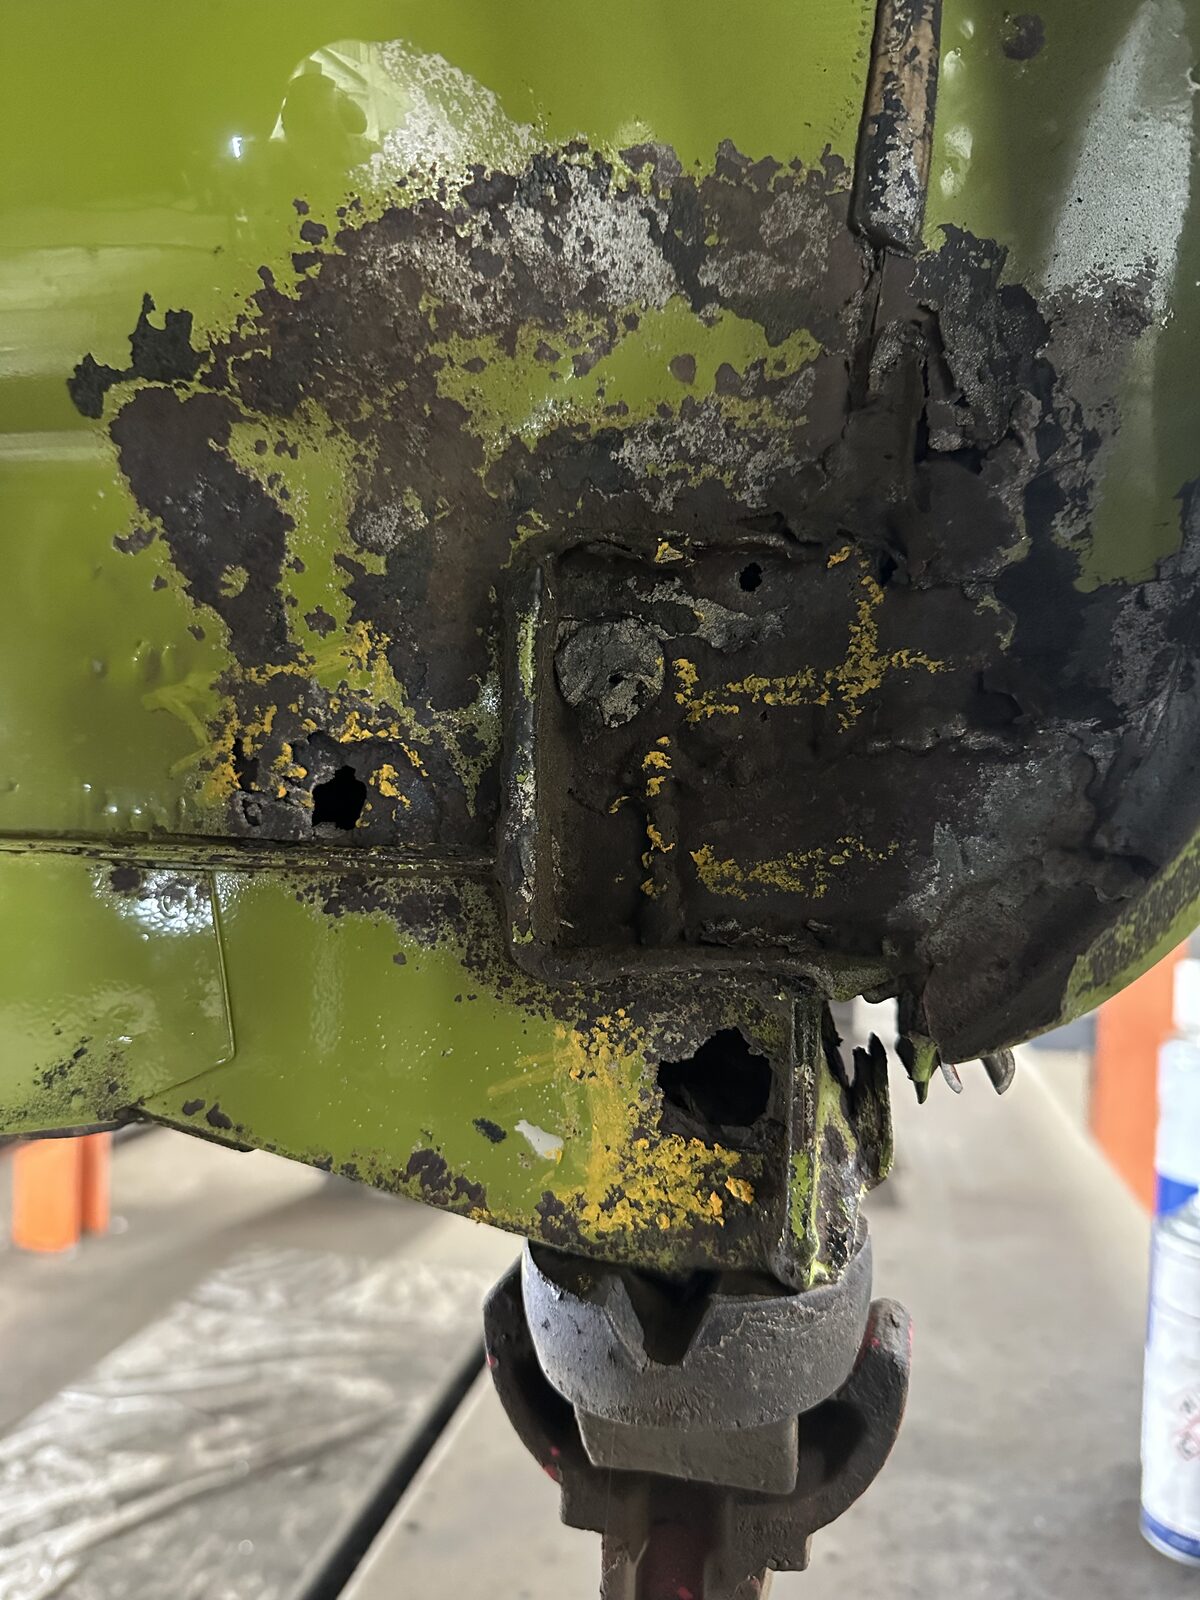
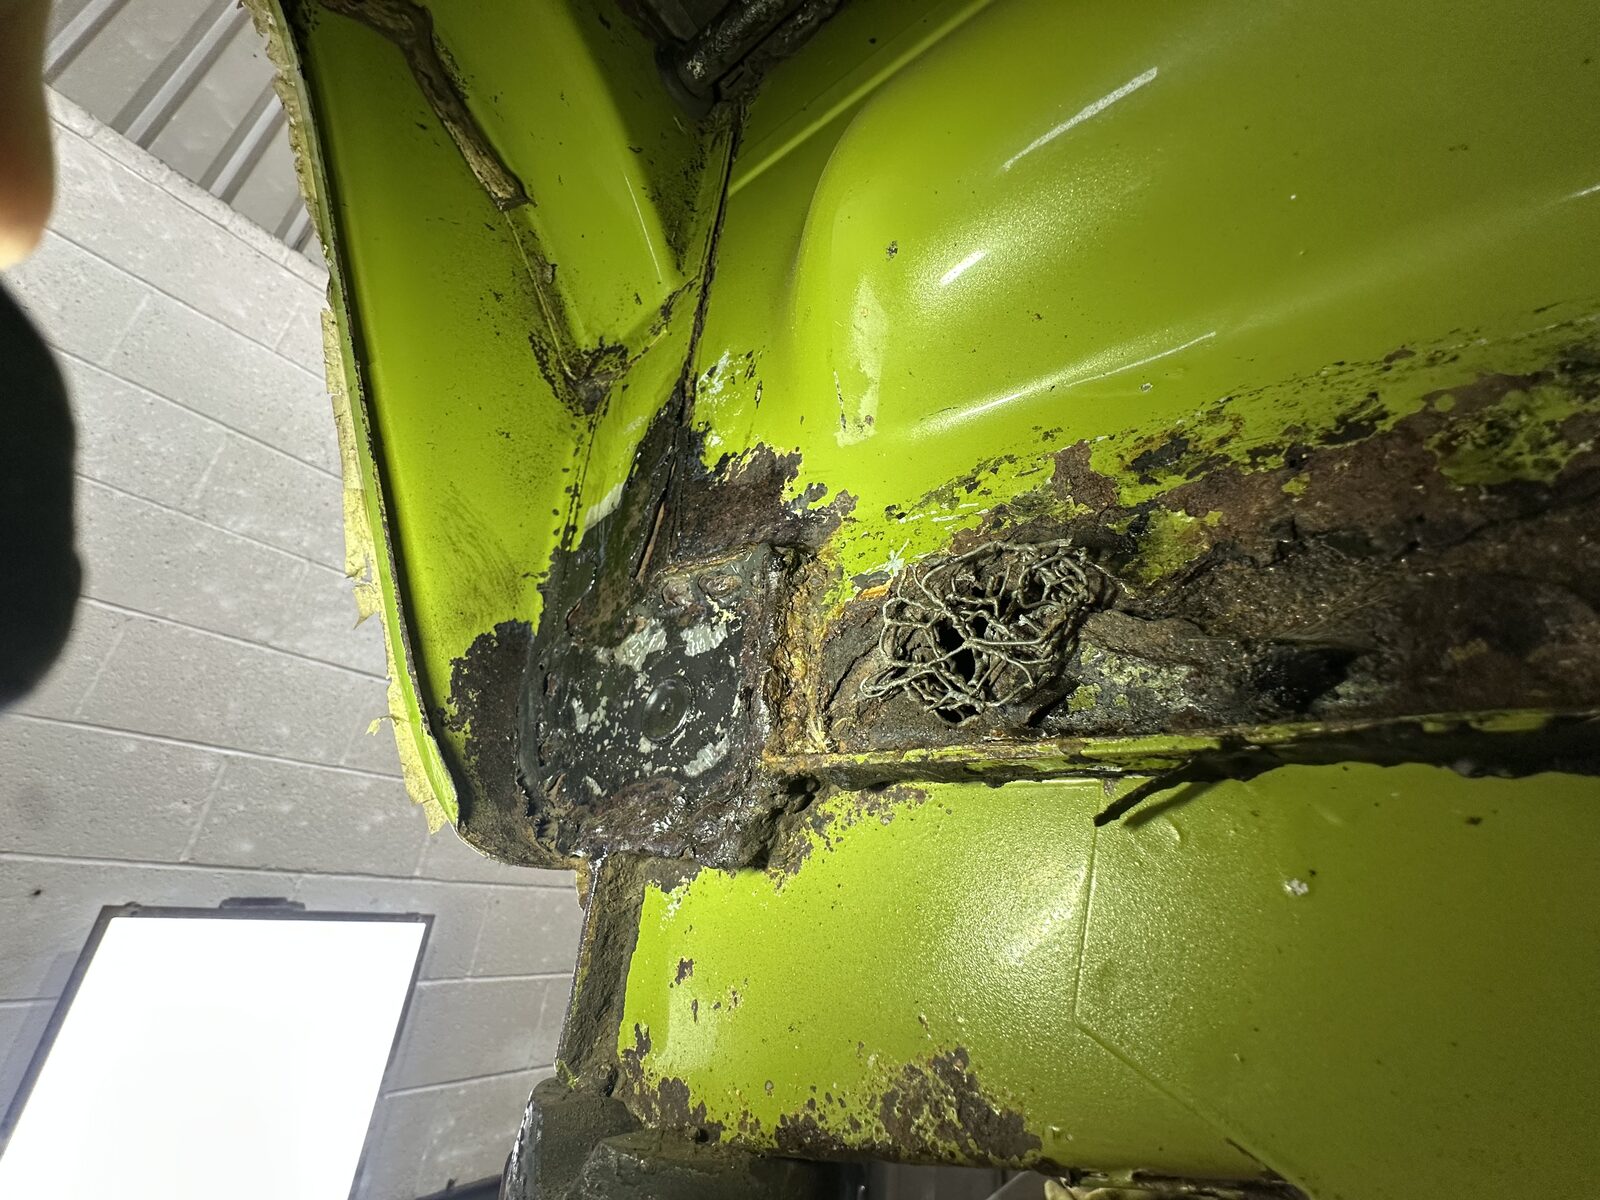
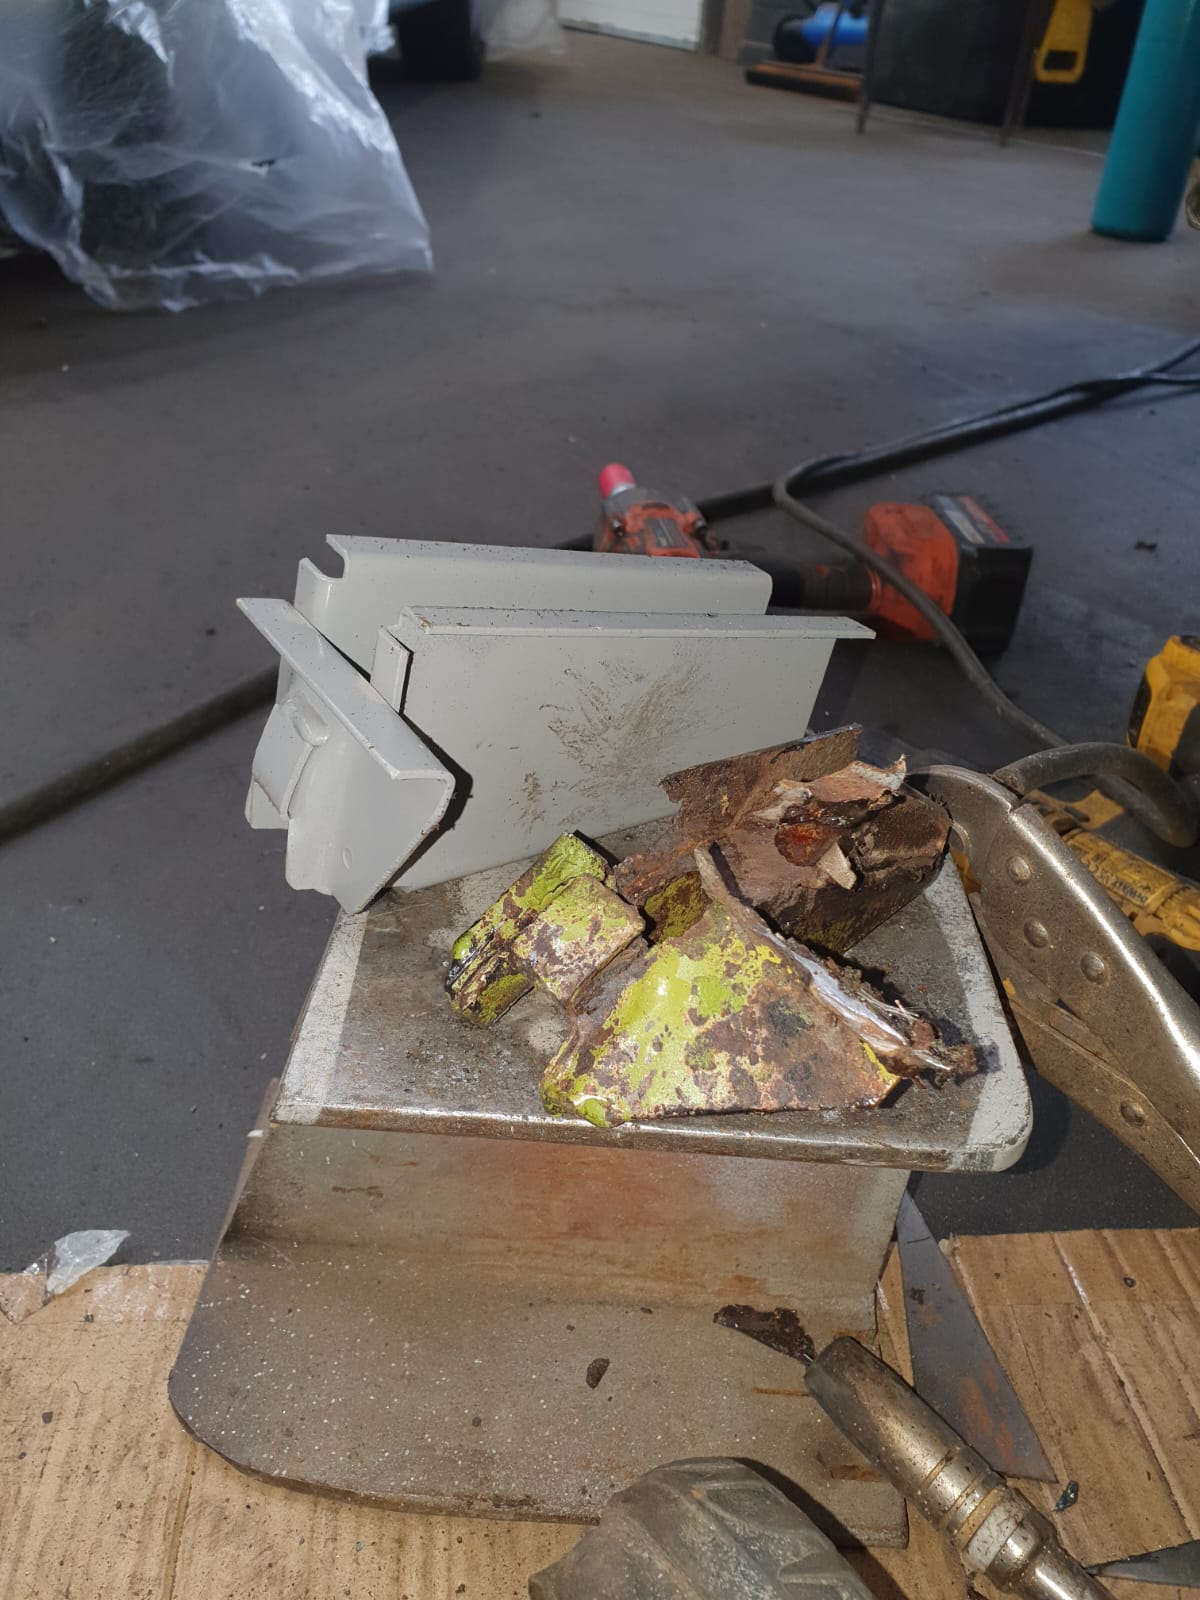
Hidden corrosion and an old repair
With the underside clean, the real condition showed. Corrosion had gone right through the metal in the beam in more than one place, there was heavy corrosion around a jacking point and lower arch, and an old fibreglass-and-chicken-wire repair had been hiding rust rather than fixing it. This is the moment the programme pauses – everything is photographed, shared and agreed before any further work.
Cut the perforated and bodged sections back to sound steel, weld in fresh metal and new jacking points, neutralise the active corrosion across the underside with multi-stage rust treatment, then protect it properly. The customer saw this stage too – same photos, same conversation.
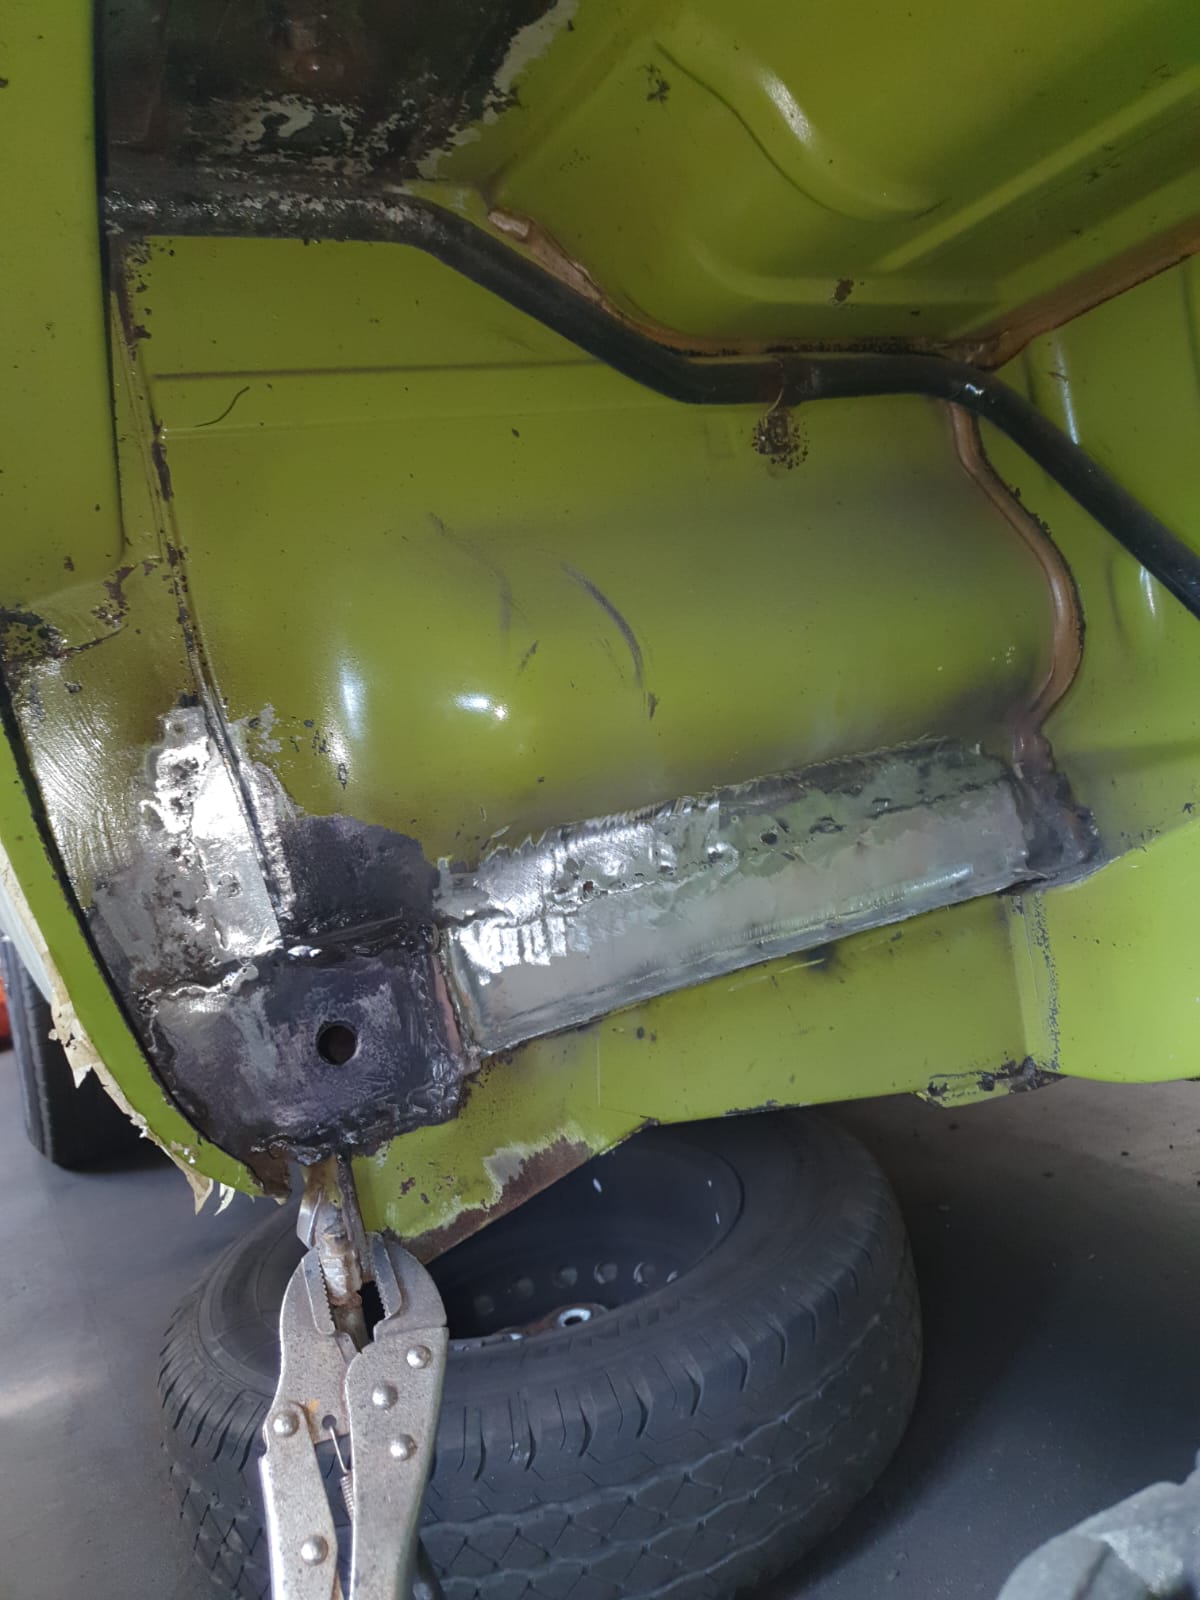
Welding the structure back to sound
Where corrosion has gone through, blasting and treatment alone are not enough – the metal has to be replaced. The affected sections were cut back to clean steel and new metal welded in, with new jacking points fabricated to replace the rotten originals. Only once the structure was sound did the camper move on to treatment and protection.
Neutralised and stabilised
With the repairs done, every affected area went through multi-stage rust treatment to chemically neutralise and stabilise the active corrosion. This lays a sound, stable foundation so the protection that follows actually adheres and lasts, rather than sitting on top of rust that keeps working underneath.
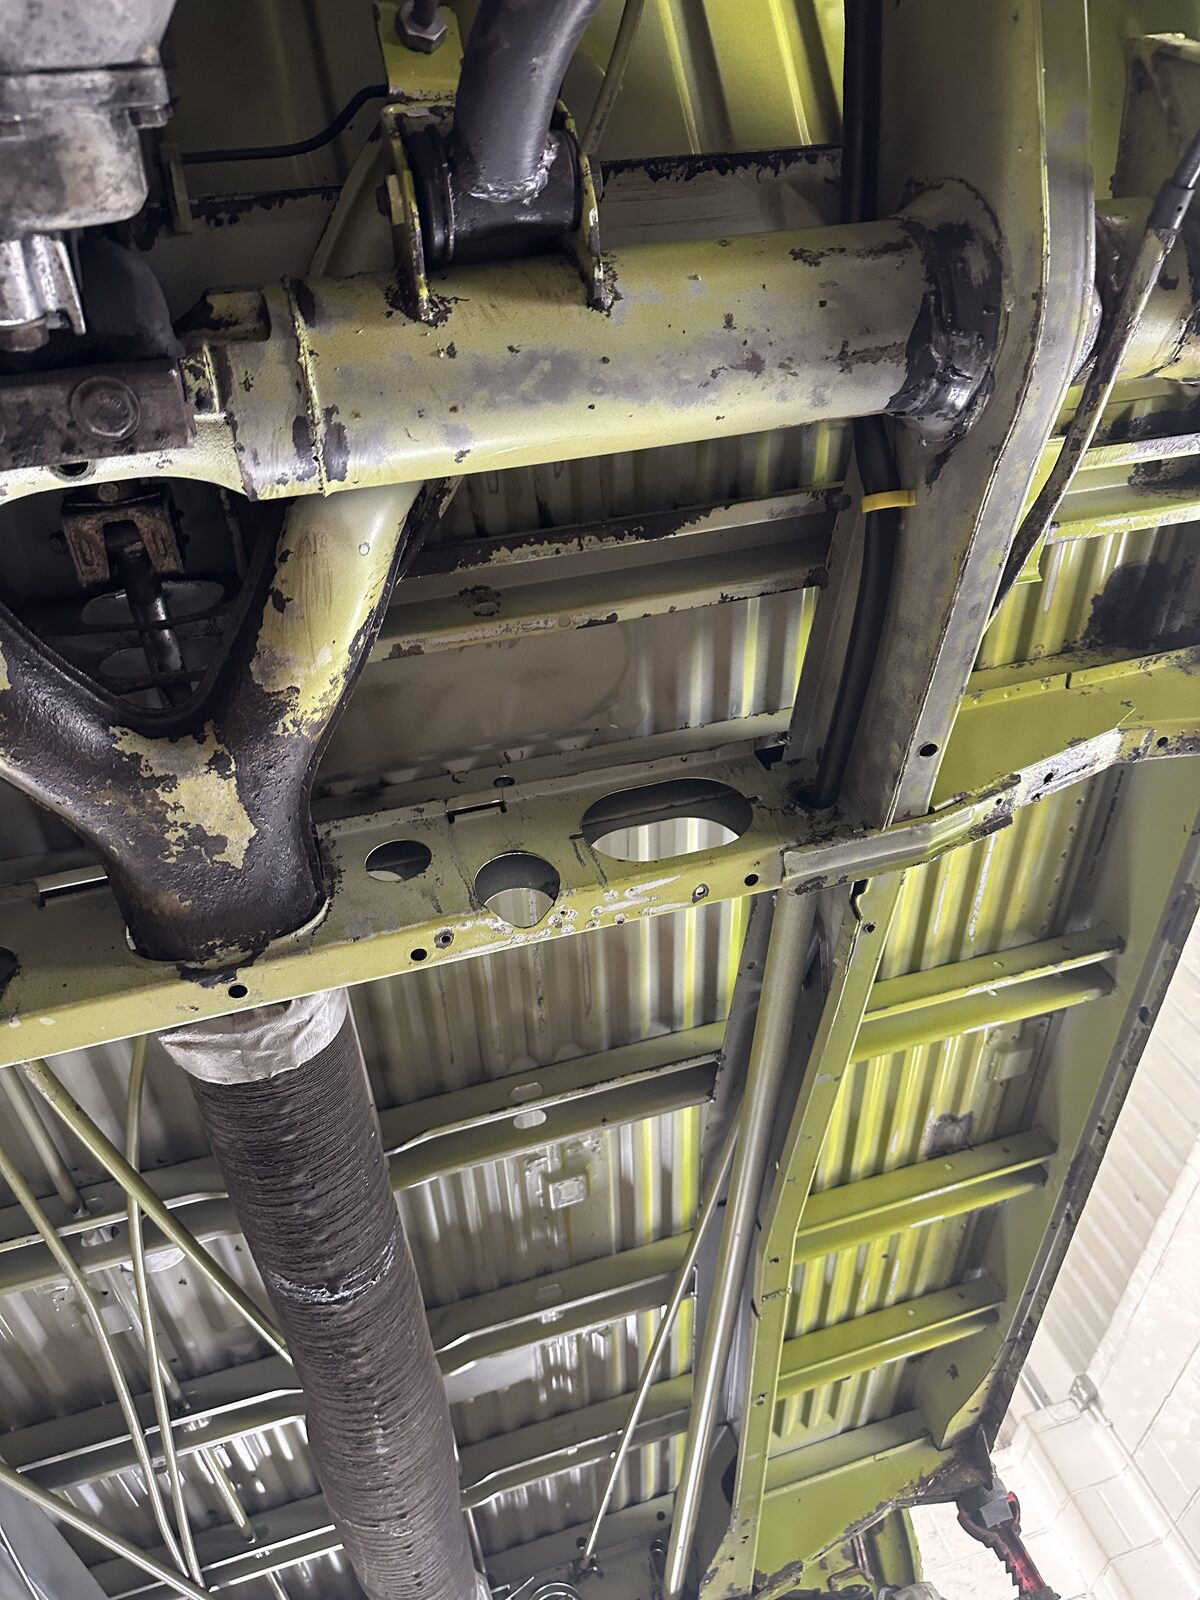
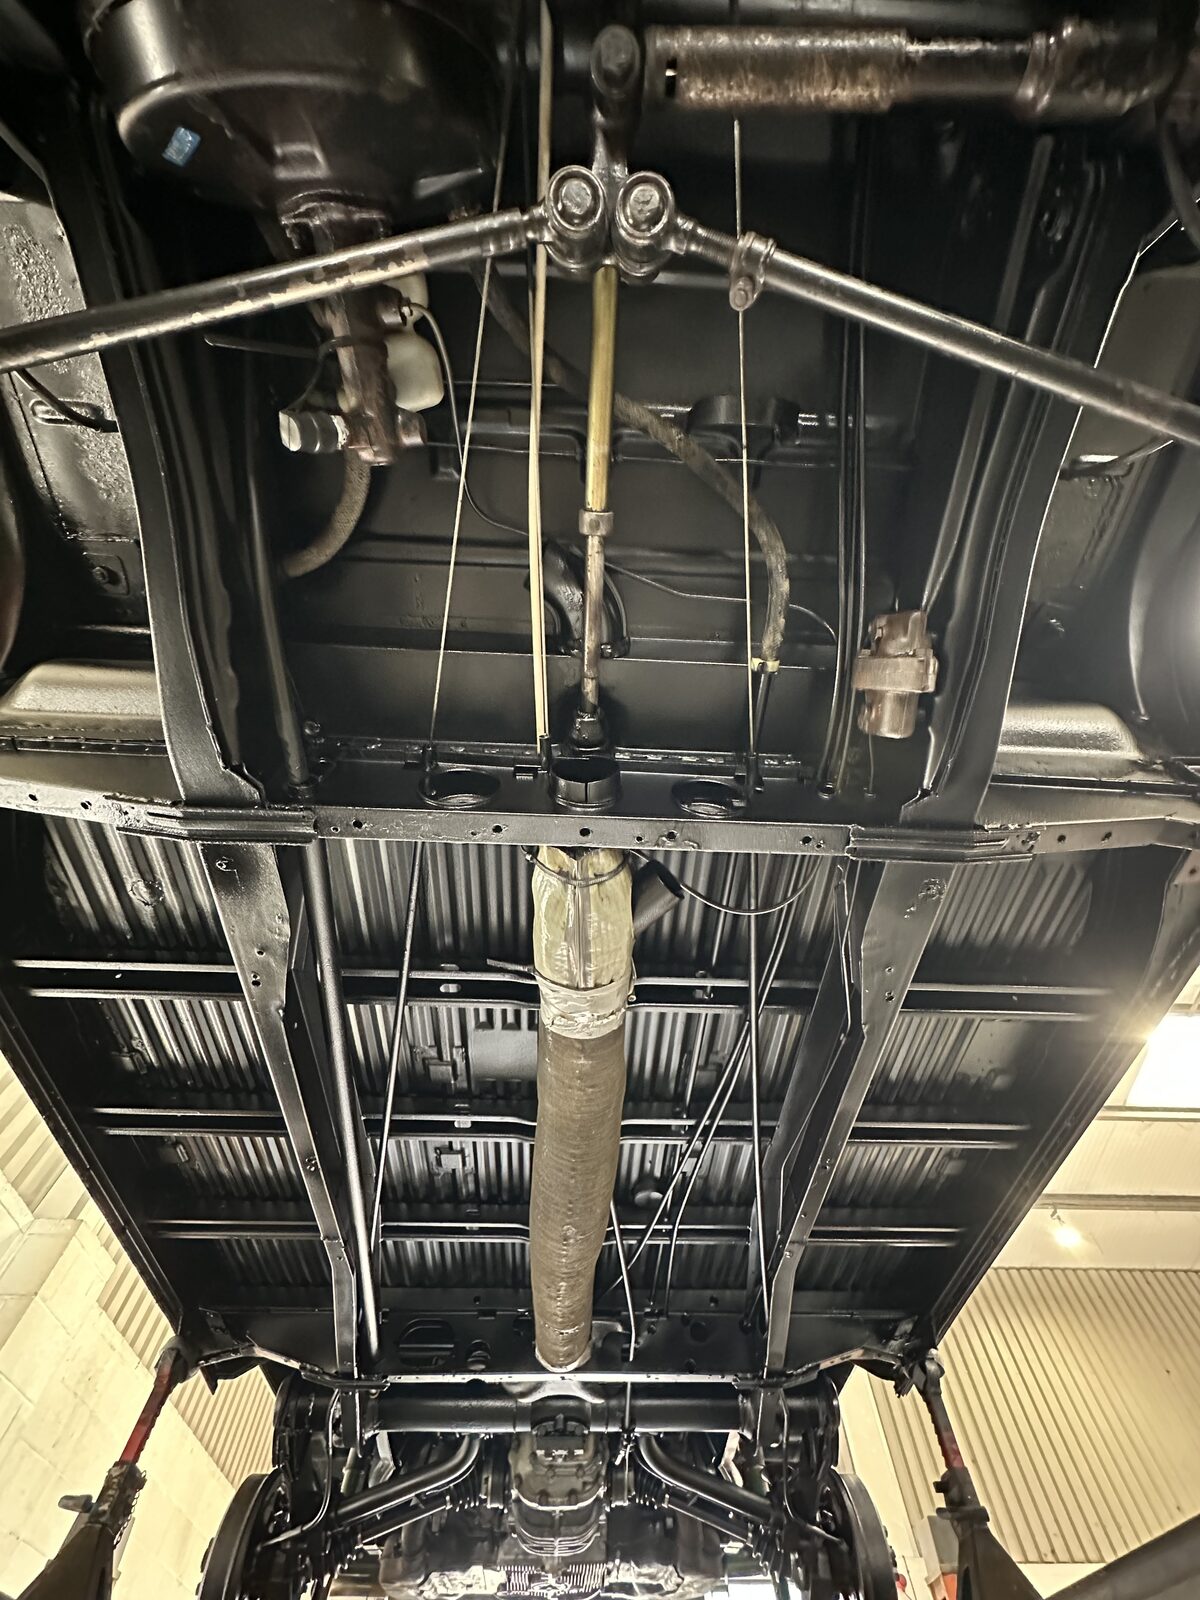
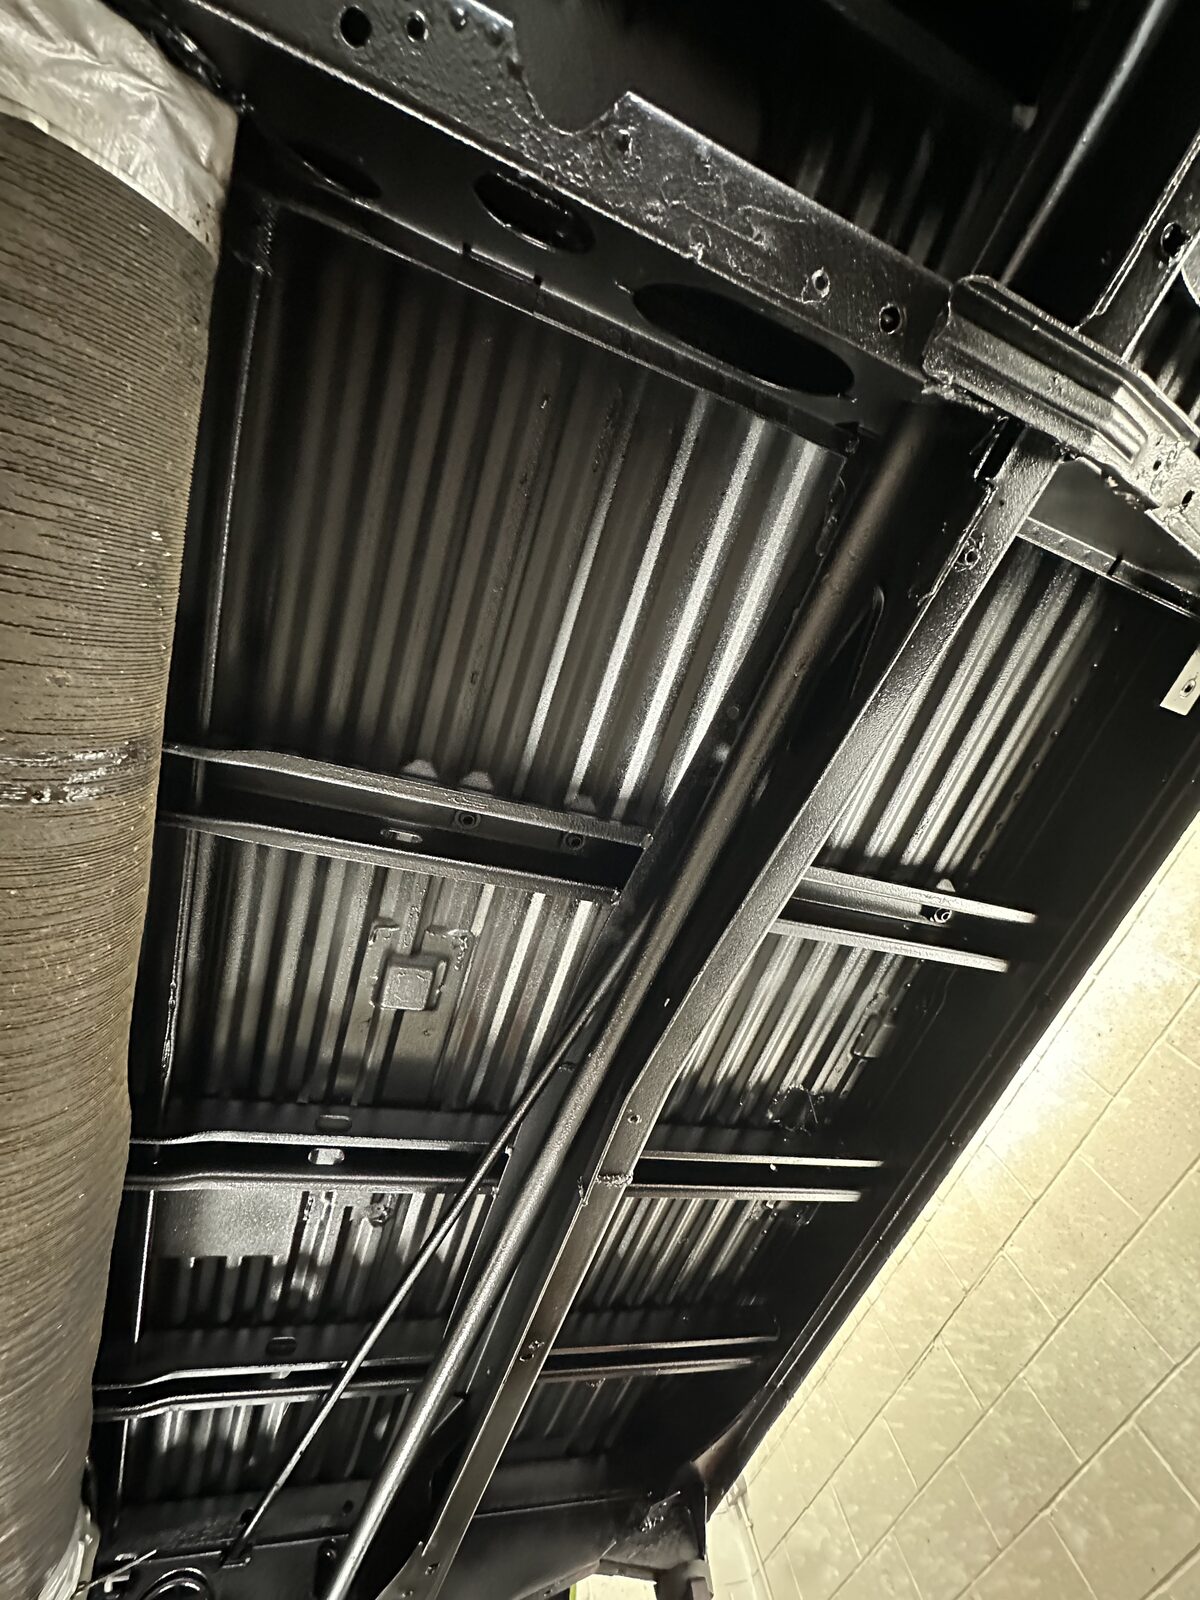
Protected, area by area
The protection was matched to each area. A durable black underbody protection sealed the exposed underside in a tough, even finish; clear protection (Bilt Hamber Dynax UC) went over selected components where keeping the metal visible mattered; and cavity wax was driven into the chassis rails, crossmembers, sills and box sections so the inside of the structure is protected too – not just the surfaces you can see.
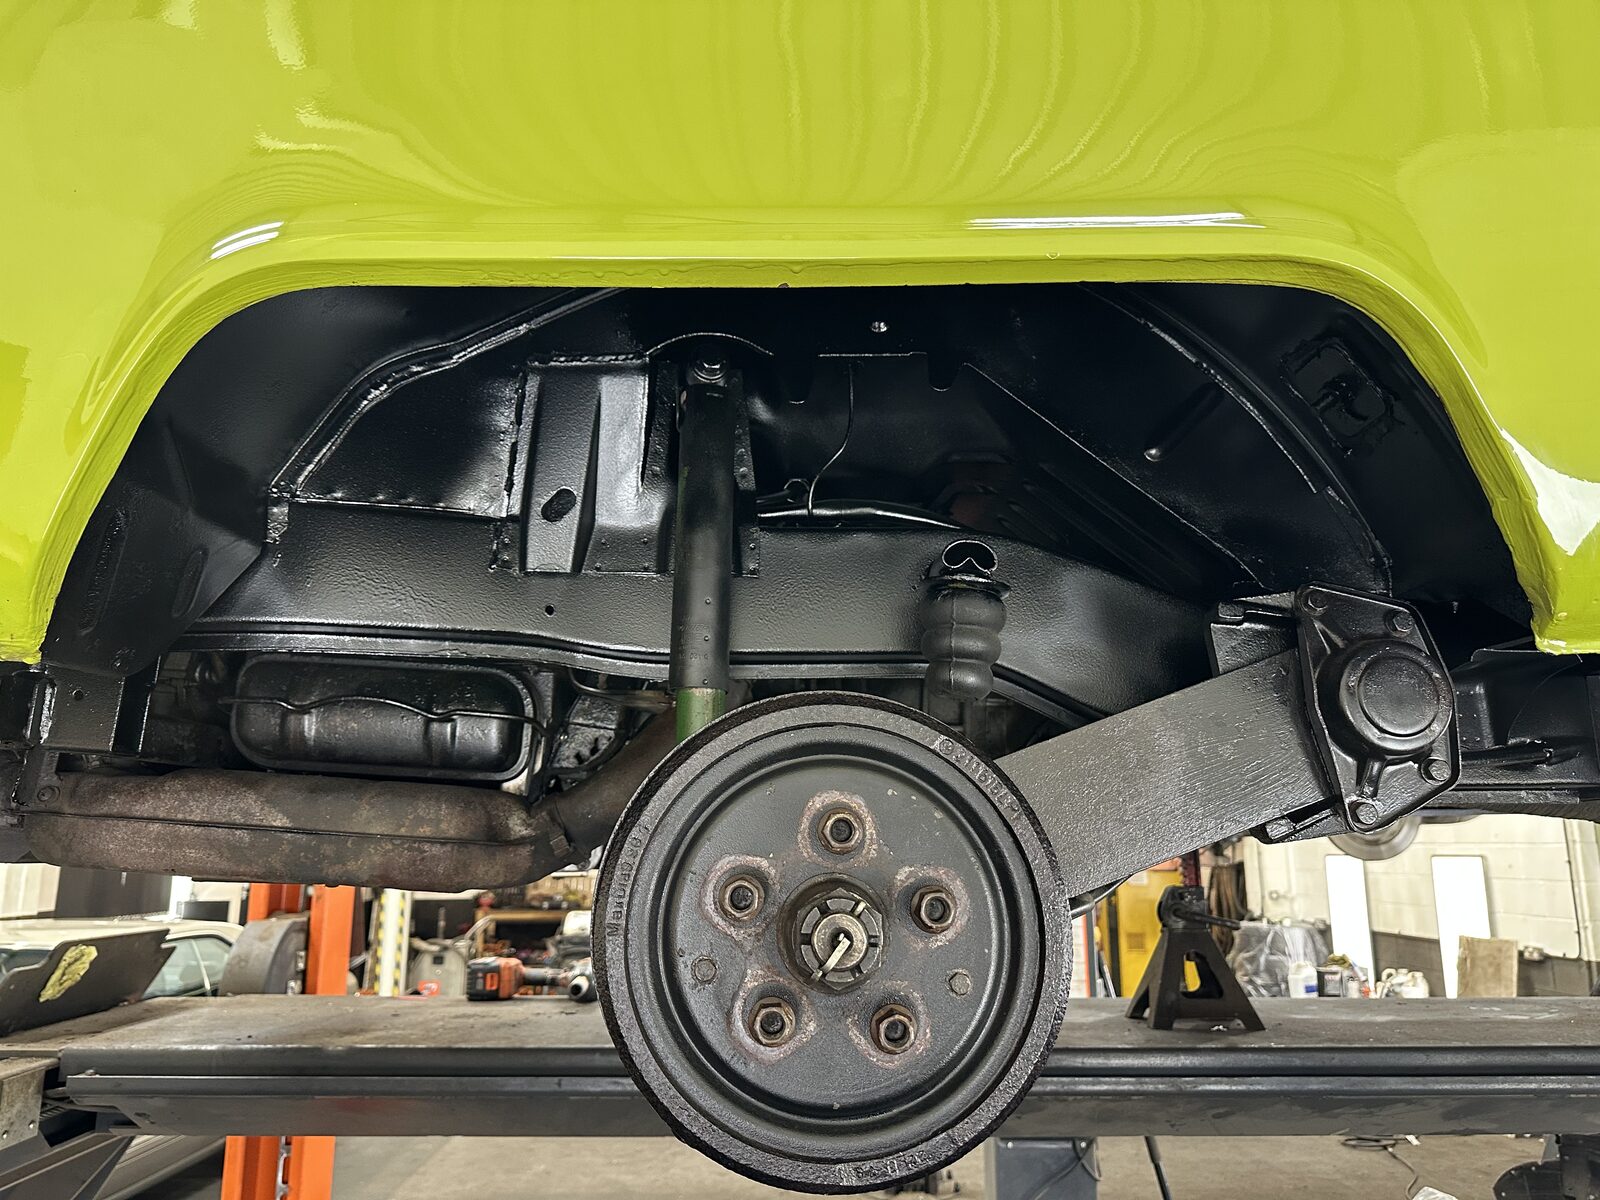
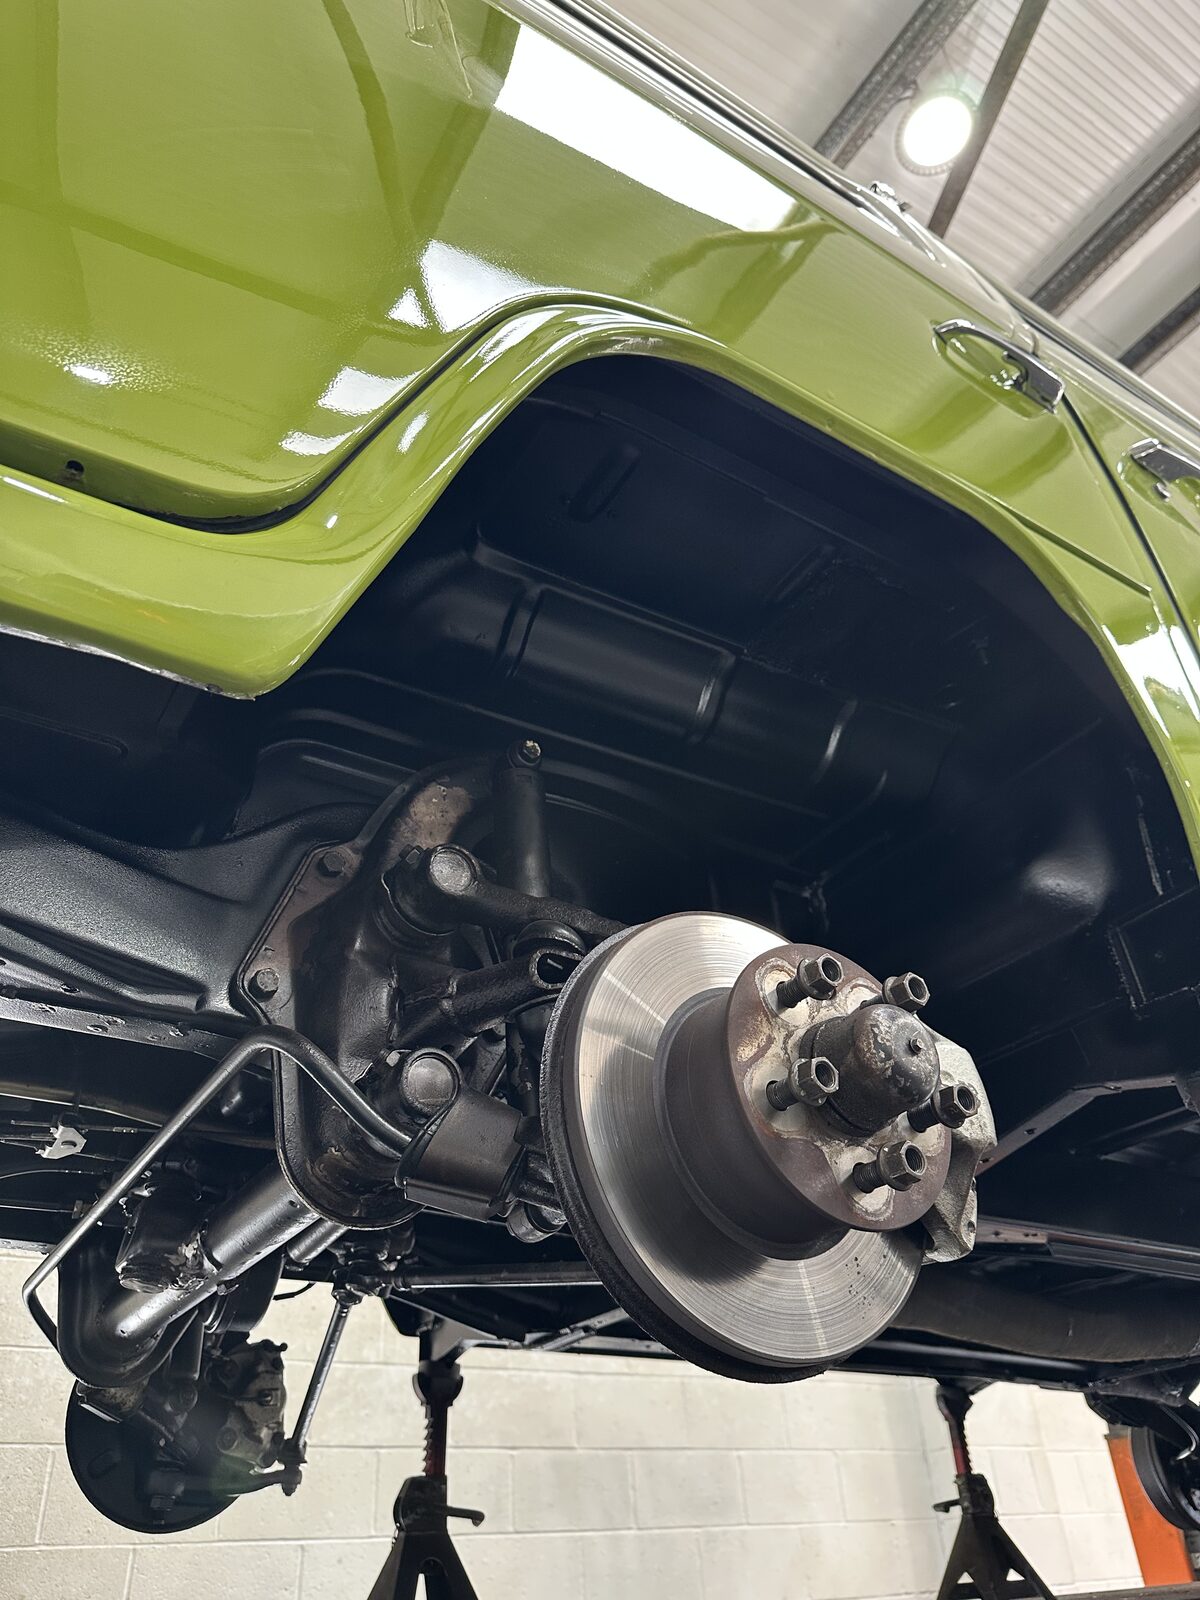
The final outcome
The underside is now properly preserved – structurally and visually. Corrosion has been cut out and welded, the metal has been treated to neutralise active rust, and the whole underbody is sealed with protection chosen area by area, with the chassis cavities waxed from the inside.
It is a documented underside, repaired and protected for the long term, and supported by preservation inspections so any area that needs attention is picked up early rather than left to spread.
Inspected. Repaired. Protected. Documented.
The camper arrived hiding decades of grime, corrosion and an old repair. It leaves with a clean, repaired, treated and protected underside – every affected area cut out and welded where needed, neutralised and sealed with the right finish for the job. The programme was documented and shared with the owner throughout, and we remain available long after for advice and annual inspections.
Customer touchpoints across photos, video and updates
Water, abrasive media or residue from dry ice blasting
New metal and jacking points let in where rust had gone through
Rust treatment to neutralise active corrosion
Protection chosen area by area, plus cavity wax in the chassis
Every stage recorded for the camper's history
Common questions about this project
What work did this Volkswagen T2 camper have done?
It went through a full underbody preservation programme: the underside was dry ice blasted to lift decades of grime and old underseal, fully inspected, then hidden corrosion was cut out and welded with fresh metal, active rust was neutralised and stabilised, and the underbody was sealed with a durable black protection, clear protection on selected components and cavity wax inside the chassis – all documented stage by stage.
Is dry ice blasting safe for a classic VW camper underbody?
Yes. Dry ice blasting lifts grime, old underseal and loose corrosion with no water, no abrasive media and no residue, and the pressure is adjusted area by area so it stays gentle on original paint, panels and fixings. On this T2 it lifted the old coatings to reveal the camper's original paint underneath.
Why does a VW T2 camper underbody need preserving?
T2 campers are now decades old, and the floor pans, sills, chassis outriggers, jacking points and wheel arches are all known rust areas. Cleaning the underside back, repairing any corrosion, neutralising active rust and sealing the metal is what keeps the structure sound and protects the value of the camper for the long term.
What happens if you find hidden rust or a previous repair?
We stop, photograph it and talk it through before any further work. On this camper we found corrosion holes in the beam and a previous fibreglass-and-chicken-wire repair hidden under the old coating. Those areas were cut back to sound metal and welded with new sections, including new jacking points, before any protection went on.
Do you carry out welding and structural repairs?
Yes. Where corrosion has gone right through the metal, blasting and rust treatment alone are not enough – the affected area has to be cut out and fresh metal welded in. On this T2 we fabricated and welded in new sections, including new jacking points, so the camper was structurally sound before it was protected.
What underbody protection is best for a VW camper?
It depends on the condition of the underside and how the camper is used. A durable black underbody coating gives a tough, even finish on the exposed underside, clear protection suits cleaner components where you want the metal to stay visible, and cavity wax protects the inside of the chassis rails and box sections. The key is that the metal is cleaned, repaired and treated first – protection is the last step, not a cover-up.
Did you treat the inside of the chassis as well?
Yes. Cavity wax was driven into the chassis rails, crossmembers, sills and box sections so the inside of the structure is protected, not just the surfaces you can see. On a camper, that is where rust often starts unseen, so treating the cavities is an important part of preserving it.
Will dry ice blasting damage the camper's original paint?
No. Dry ice is non-abrasive – it lifts grime and failed coatings without cutting into sound paint or metal. On this T2 the blasting actually revealed the camper's original paint where it had been buried under old underseal for years.
How long does a camper underbody preservation take?
It depends entirely on what we find. A clean underside is far quicker than one that needs corrosion cutting out, welding and fabrication like this T2 did. We inspect first, share the findings and agree the scope before quoting time and cost, so there are no surprises.
Is the work documented for the camper's history?
Yes. The underside is photographed before, during and after, and the findings are shared with you throughout – this project alone ran to well over twenty separate customer touchpoints. The full record is kept for the camper's history file.
Your classic could be next
Tell us about your vehicle and what you want to achieve, and we'll recommend the right preservation programme with a quote to match.
Get Instant Quote